How To Enable Developer Console in CS2

By tj_css
In this short guide, we will be teaching you how to open the developer console in CS2. The developer console is a powerful tool that allows you to do many useful and fun things in CS2, such as changing (custom) game settings, enabling cheats and commands, enabling FPS and other performance metrics, and many other functions.
Enabling the developer console:
Before you can use the developer console, you’ll need to enable it. If you’ve already enabled the developer console before in CS:GO, the steps are the same. If not, we will teach you here:
1) Launch CS2 and navigate to the main menu.
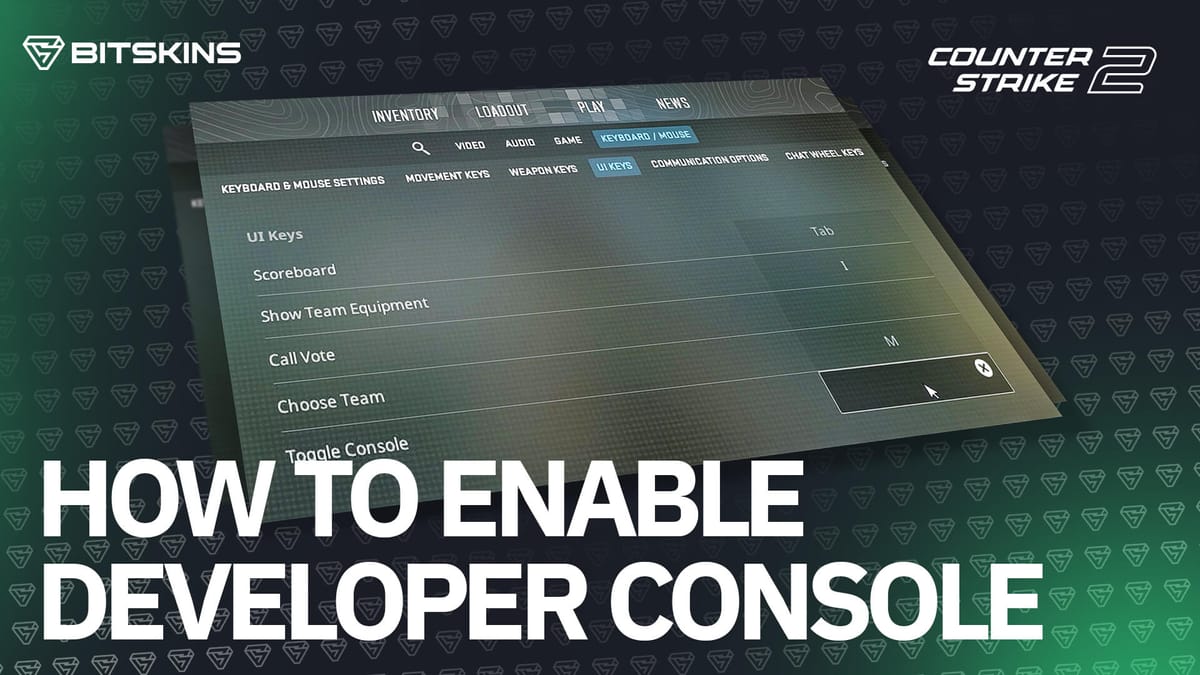
2) Access the game settings: Click on the gear icon in the top left corner of the screen.
3) Head over to “Game” in settings.
4) Find the "Enable Developer Console" option and set it to "Yes."
5) Open the console: press the ~ key. It is usually located left of the “1” key on full-sized keyboards.
Developer Console Commands
Now that you’ve enabled the developer console, here are some useful commands you can try out.
1) Sv_cheats 1: Sv_cheats 1 enables the use of cheats in a custom game/ custom server.
2) Cl_showfps 1: cl_showfps 1 displays your FPS on your screen.
3) Mp_restartgame 1: Allows you to restart your custom game.
4) Fps_max 0: Disables the default FPS cap
5) Noclip: Allows you to noclip through the server. (Sv_cheats must be enabled)
6) God: Enables god mode.
7) Disconnect: Disconnects you from the current server.
8) Kill: Instantly kills you.
9) Quit: Shuts down CS2 and returns you to the desktop.
Please remember that not all commands work on official or custom servers.
Enjoy using your newfound knowledge to give yourself some quality of life improvements with CS2, or to troll your friends in custom games. Happy gaming!