Top 10 Most USEFUL Mirage T-Side Smokes

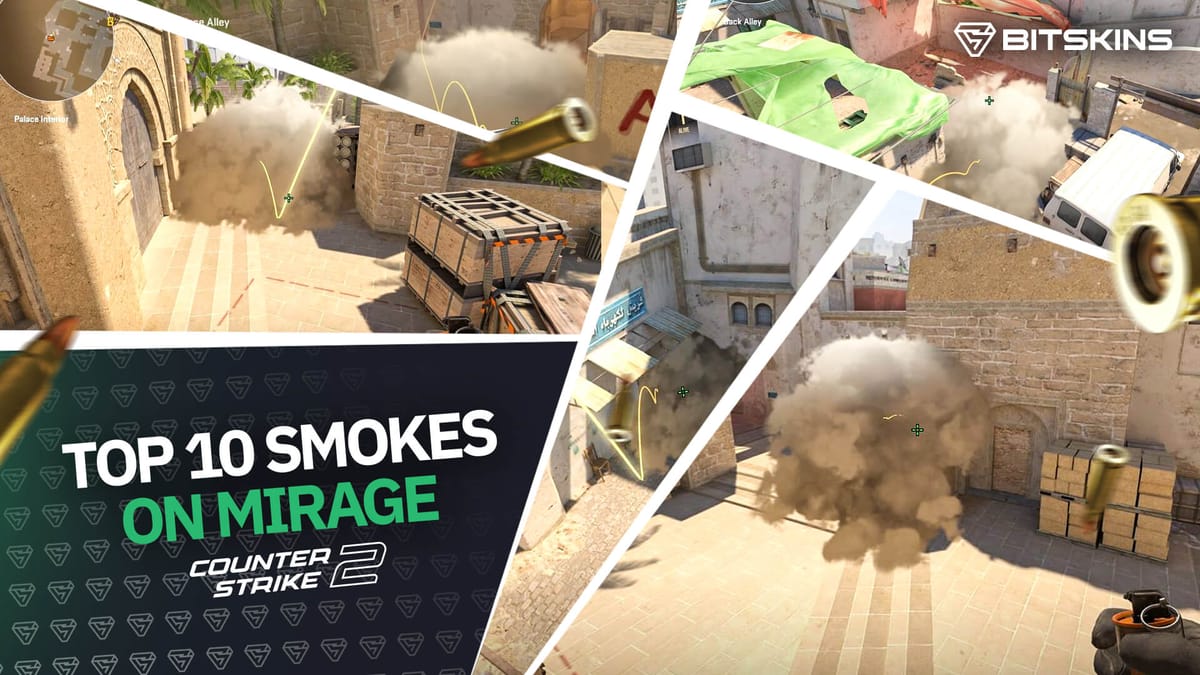
The difference between a quick and successful site execute and a failed execute is an uncoordinated utility setup. With Counter-Strike 2 moving to MR12, your T-side executes are much more important to win more games and build your premier rating elo. Because of Counter-strike 2’s volumetric smoke system, many meta CS:GO smoke lineups are no longer useful so alternatives should be used. This guide will break down some of the most useful smoke lineups for mirages T-side, from A site, B site, and mid smokes.
It’s worth noting that most of these smoke lineups require precise timing that requires a jump-throw bind to ensure consistency. There are many versions of the jump-throw bind, but the normal jump-throw is the most useful. An example command is shown below.
alias "+jumpaction" "+jump;";
alias "+throwaction" "-attack; -attack2";
alias "-jumpaction" "-jump";
bind "KEY" "+jumpaction;+throwaction;"
You can copy and paste these commands into the developer console, making sure to replace “KEY” with your desired jump-throw bind key, such as “v” for example.
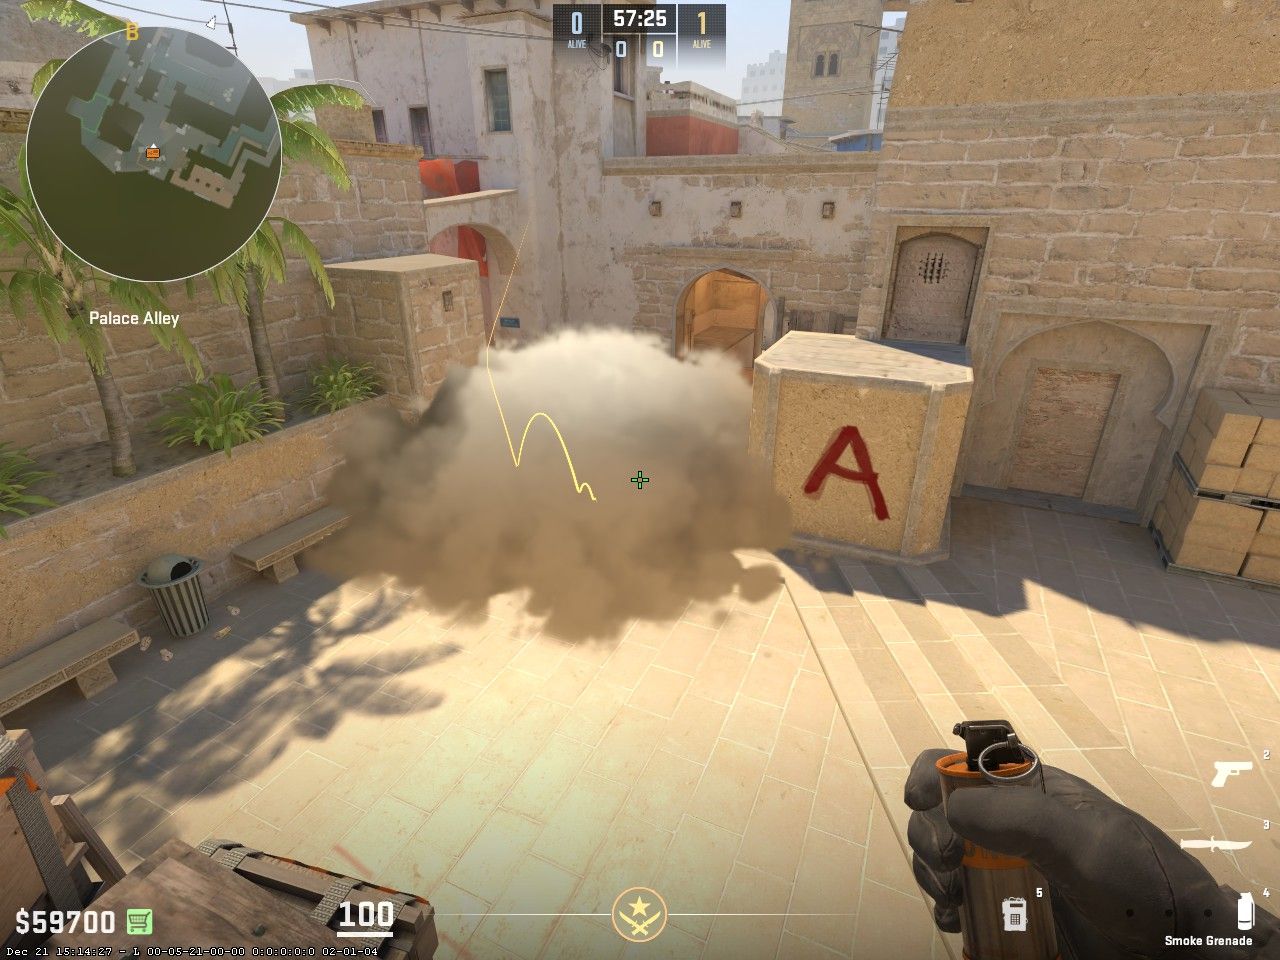
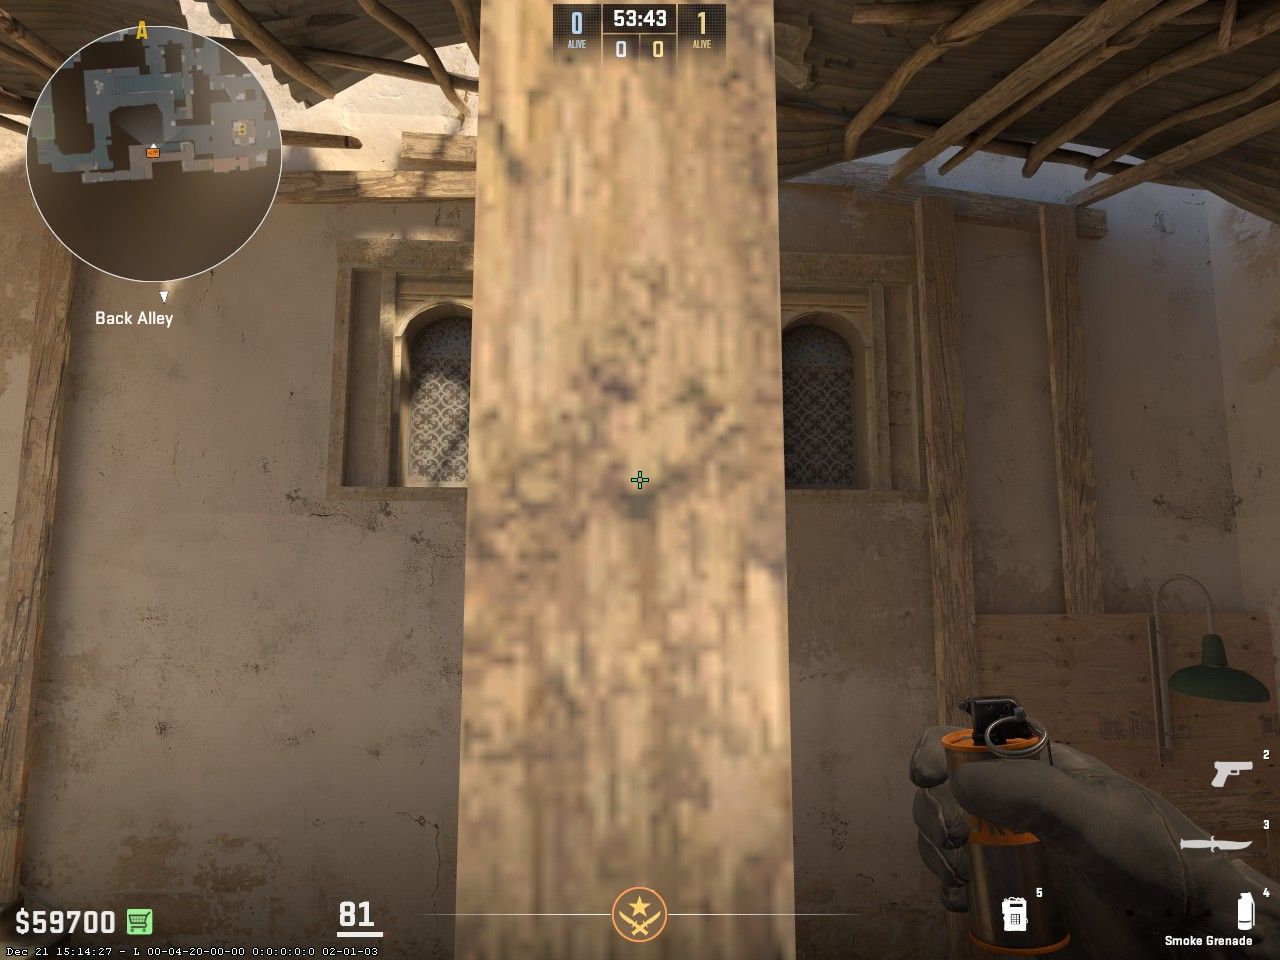
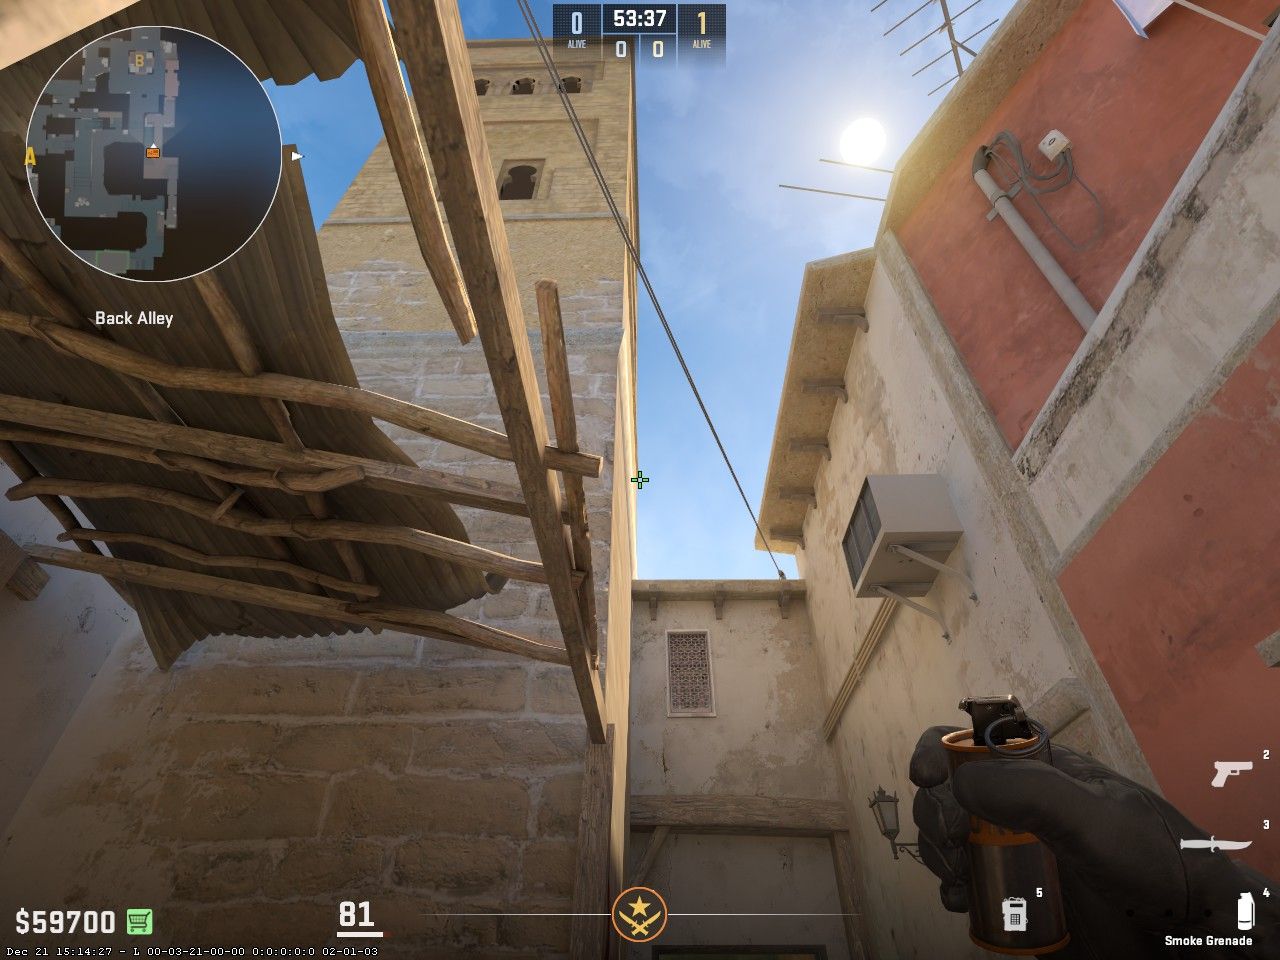
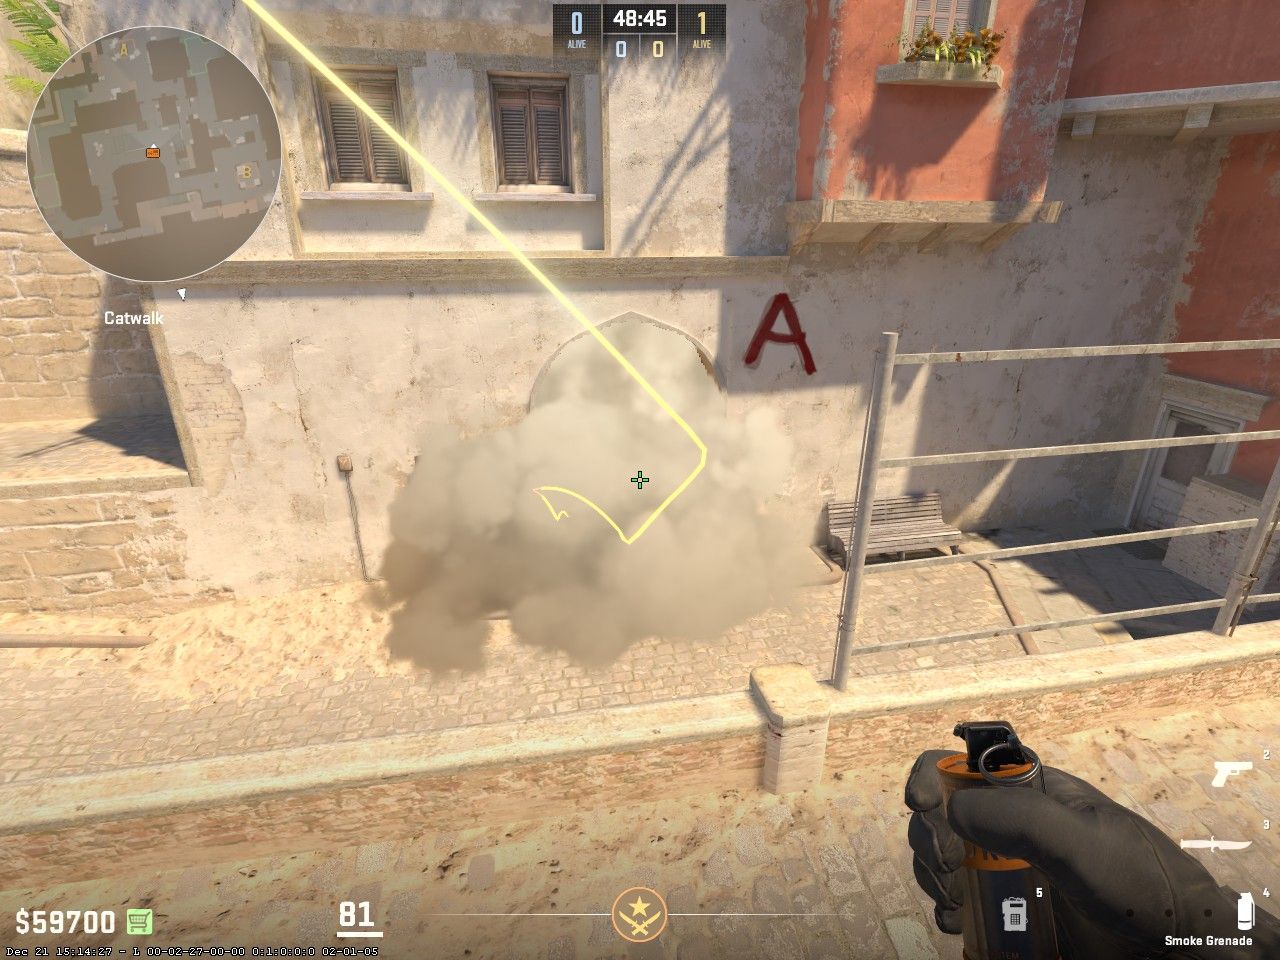
A Site Ticket Smoke:
First, align yourself flush against this wall and right in the middle of this dark spot.
Once aligned, place your crosshair on top of this wooden pillar and left-click jumpthrow.
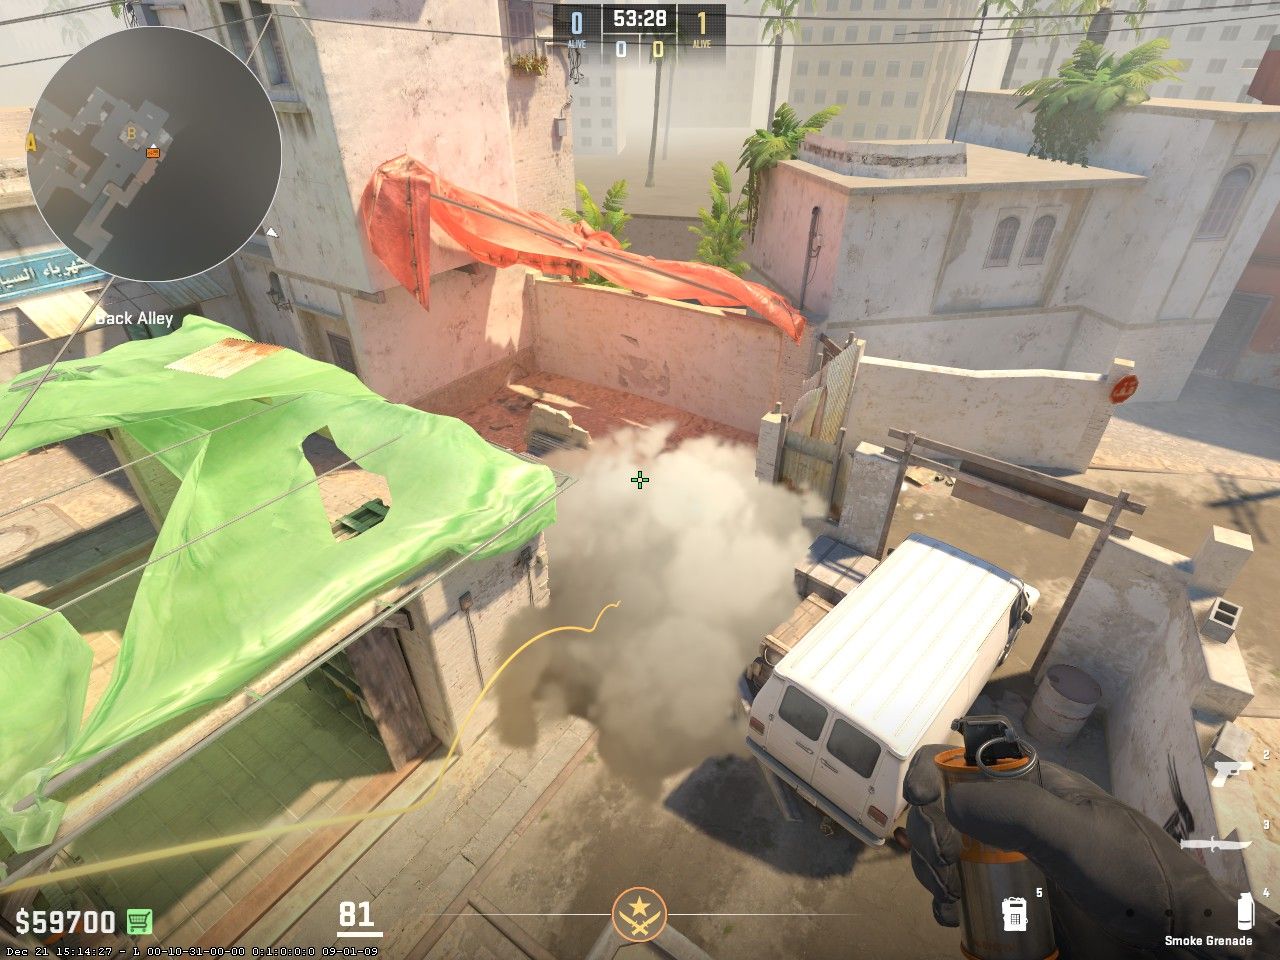
When done properly, this perfect gapless smoke is the result of a successful ticket smoke.
A Site Stairs Smoke:
First, climb atop this ledge and get yourself stuck next to this wooden pillar.
Next, align your crosshair on the top right of this large brick as shown then hold LEFT AND RIGHT click and jumpthrow.
When done correctly, this stairs smoke will cover all of stairs, leaving sandwich open to discourage CTs from hiding in your smoke. This smoke lineup is typically paired up with a jungle smoke. You can throw a jungle smoke from the same position and crosshair lineup except you must ONLY left-click jumpthrow. Ask your teammate to drop you a smoke and throw both of them yourself from the same position.
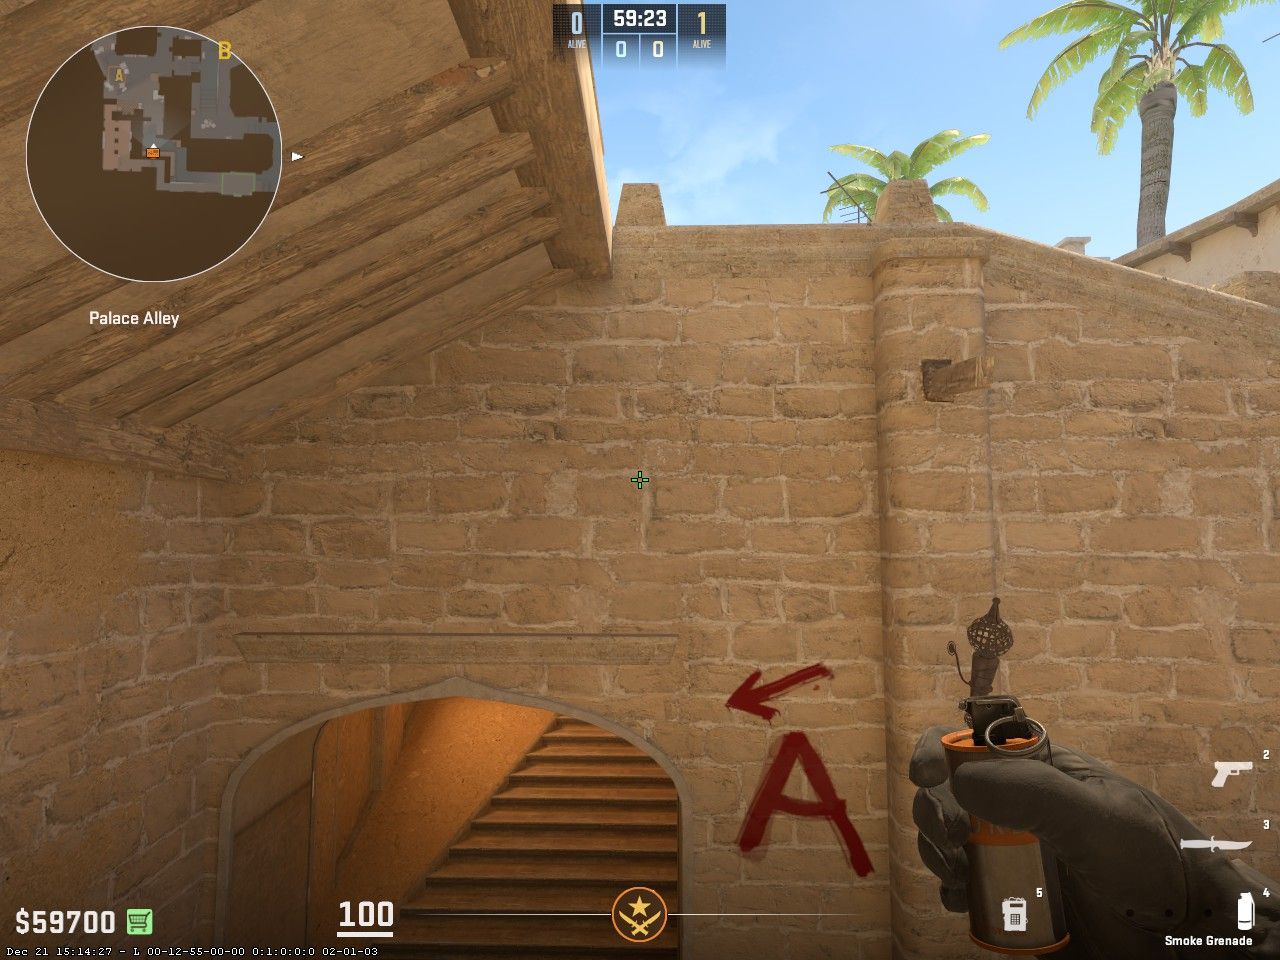
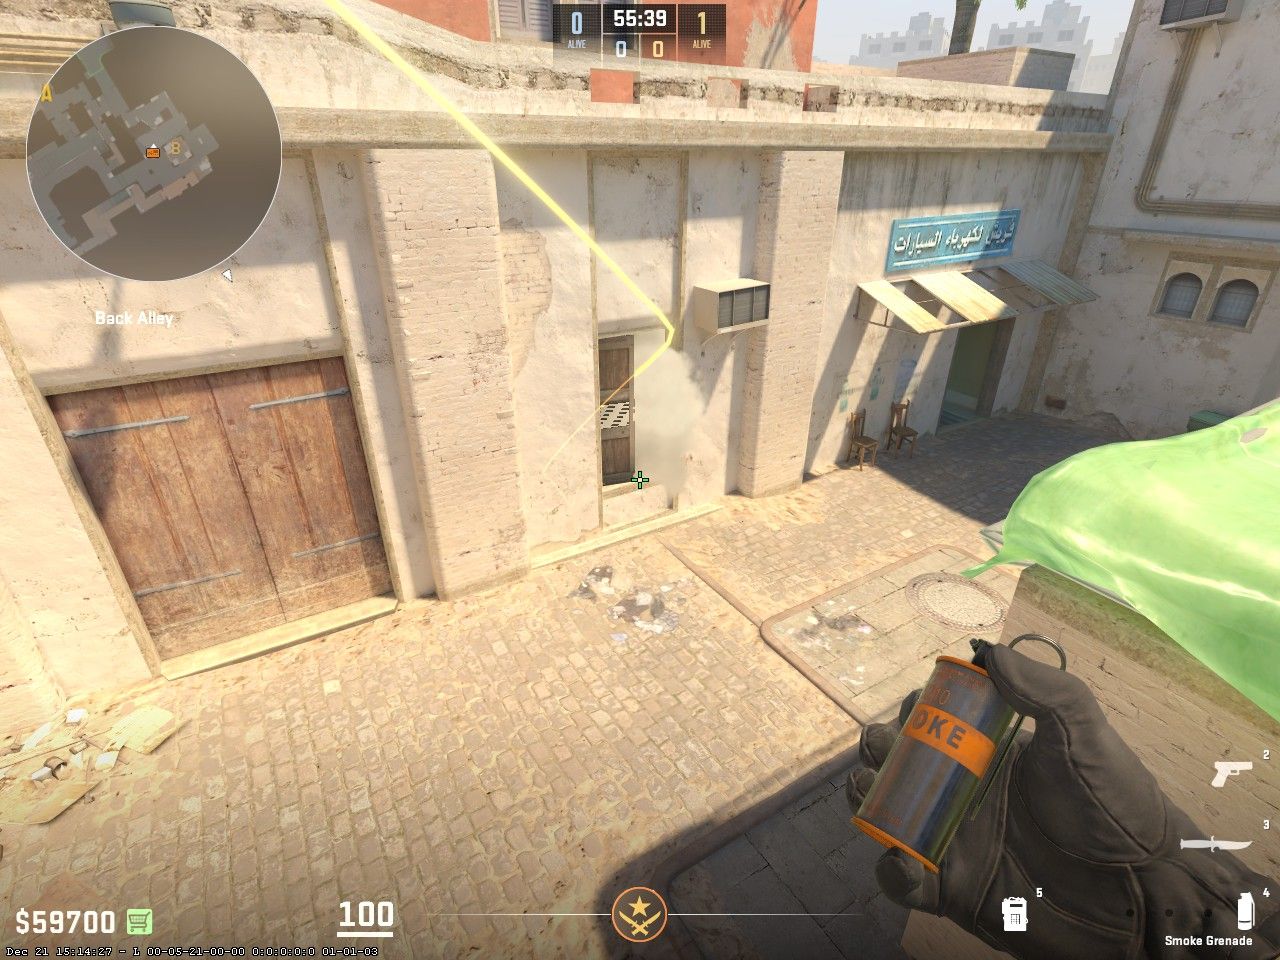
A site jungle smoke:
First, align yourself with the right side of this door as shown, and push yourself flush against the wall.
Next, aim your crosshair on these wires and left-click jumpthrow.
When done correctly, this walkway will be entirely covered. This smoke is best paired with the stairs smoke as shown previously.
Combine these three smokes simultaneously for a fast and effective A site execute which will allow you to get the bomb planted which forces the CT’s into a difficult retake.
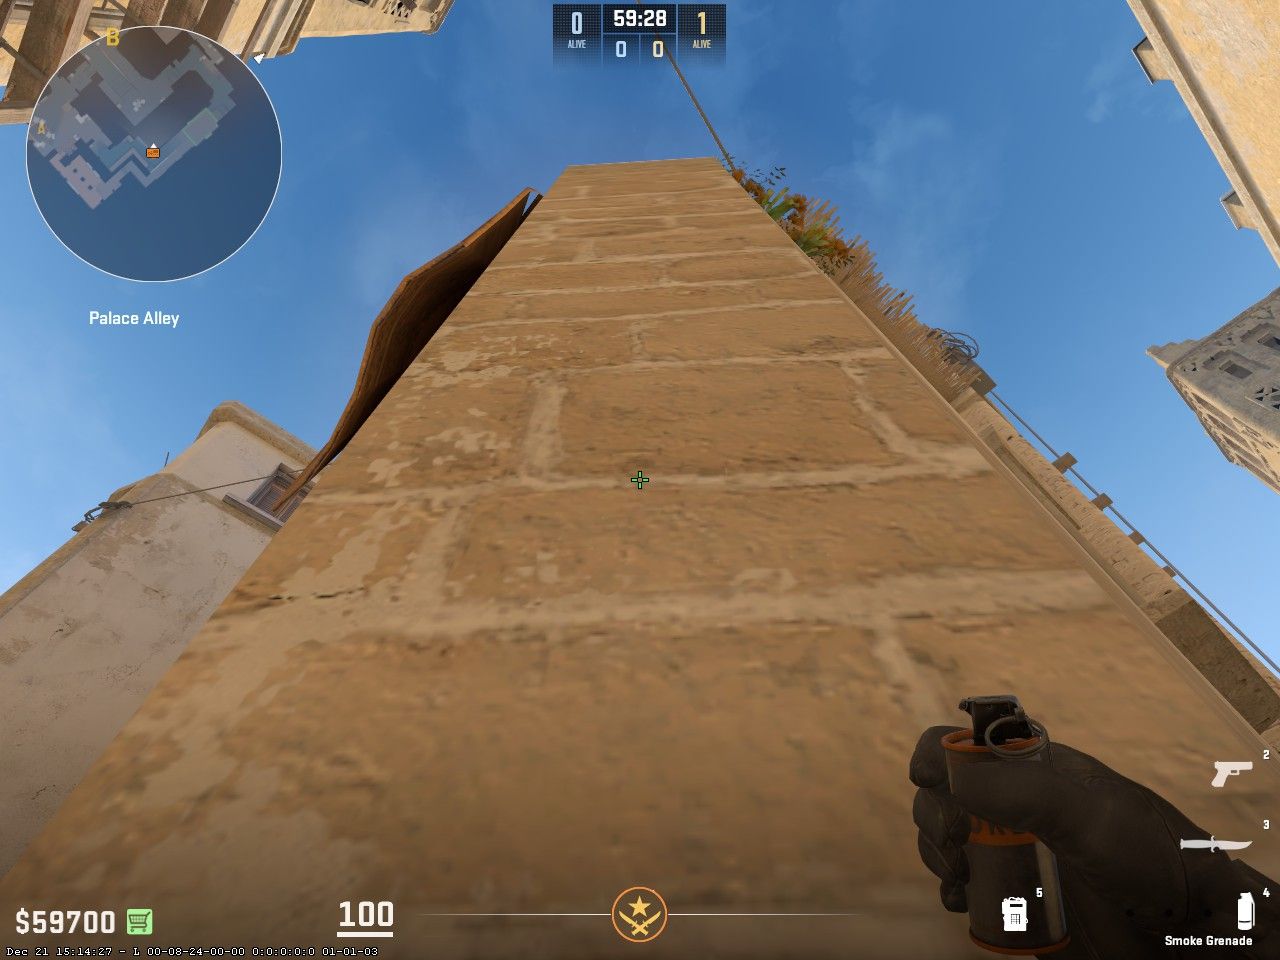
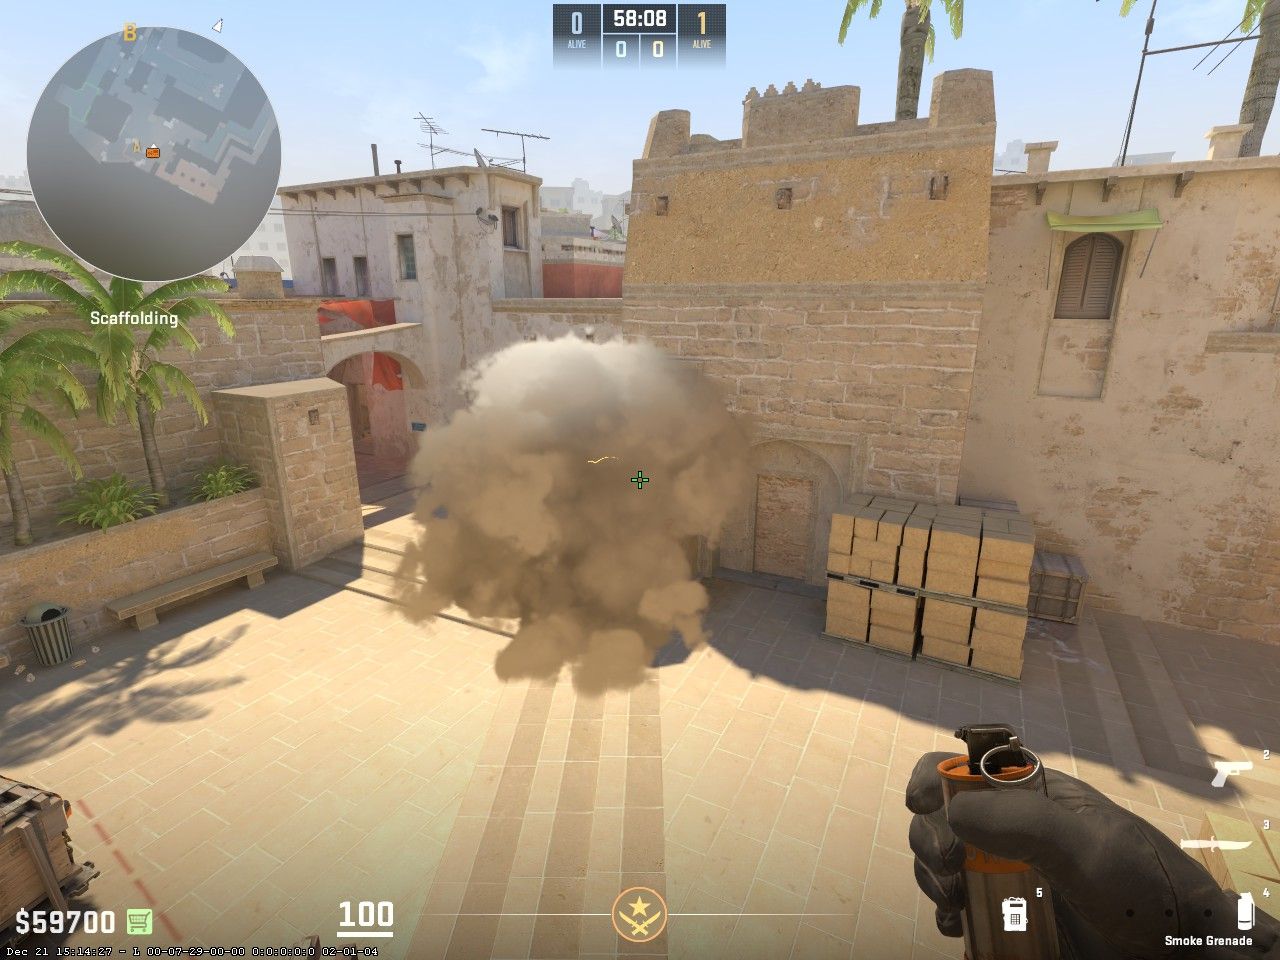
B Site Market Window:
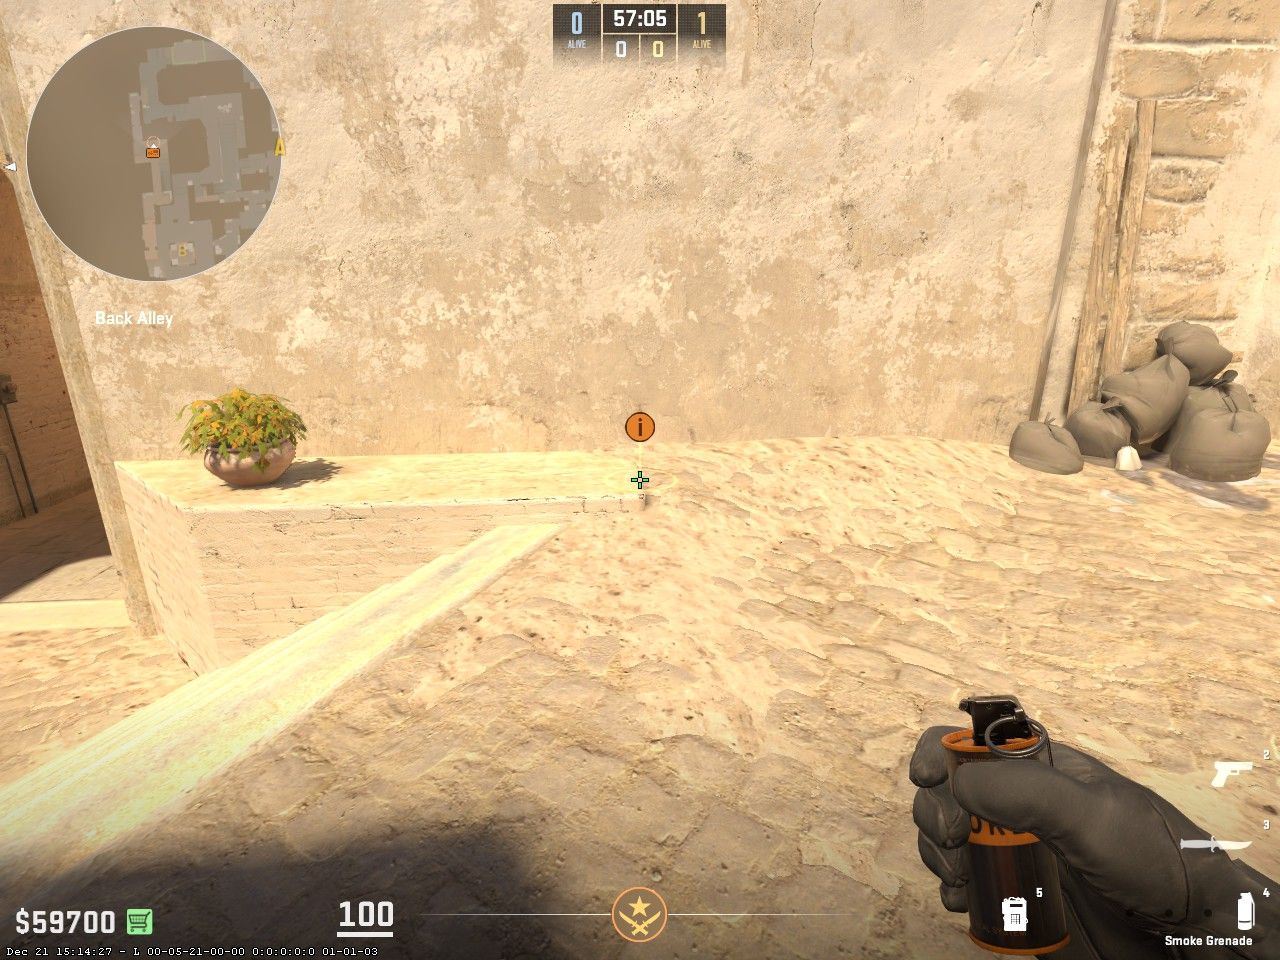
First, align yourself flush against this wall.
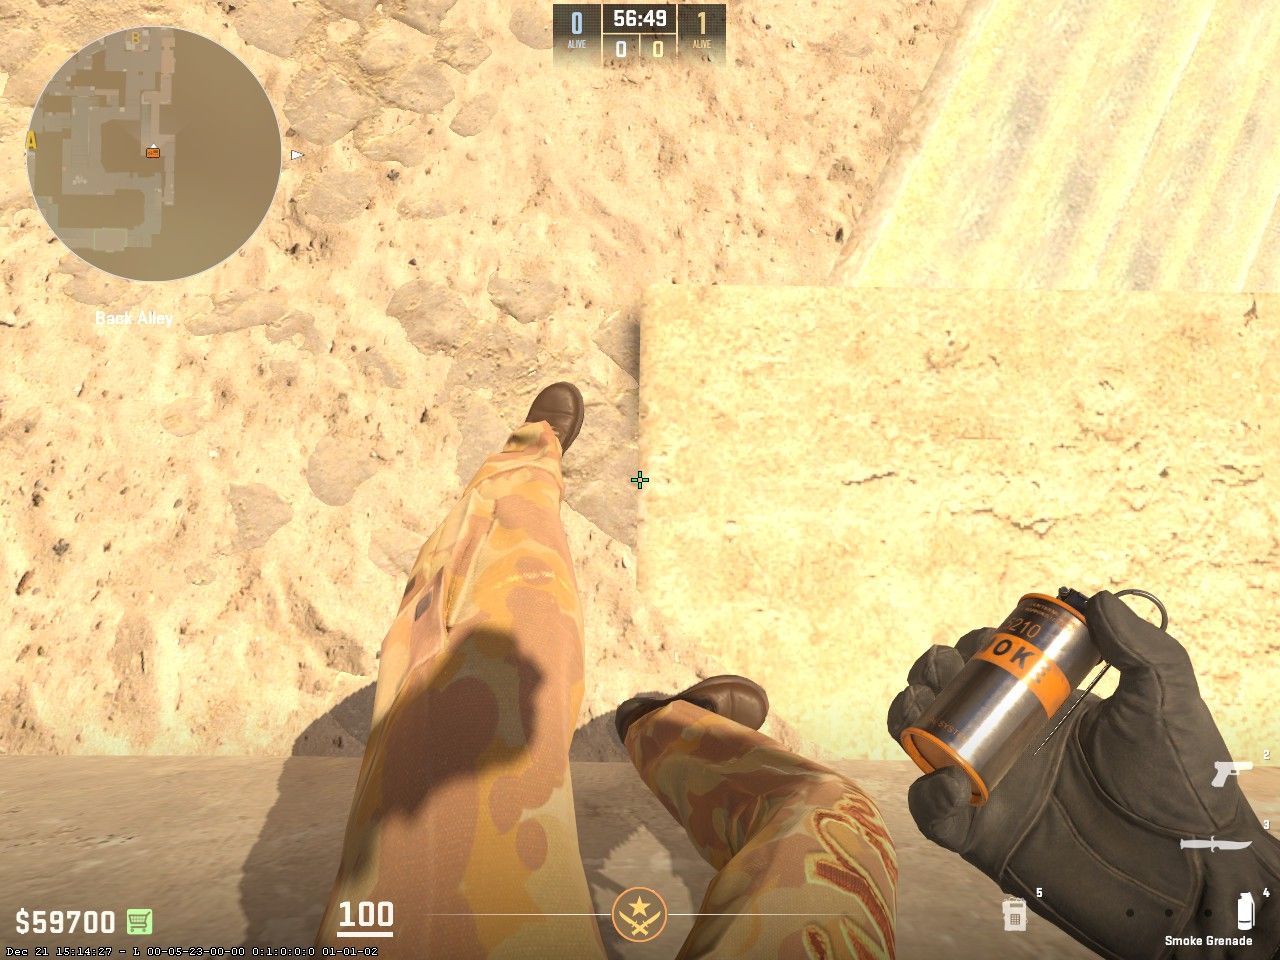
Then align yourself in between the stone floor and the sandy ground as shown.
Once aligned properly, aim your crosshair in between these two wooden pillars and left-click jumpthrow.
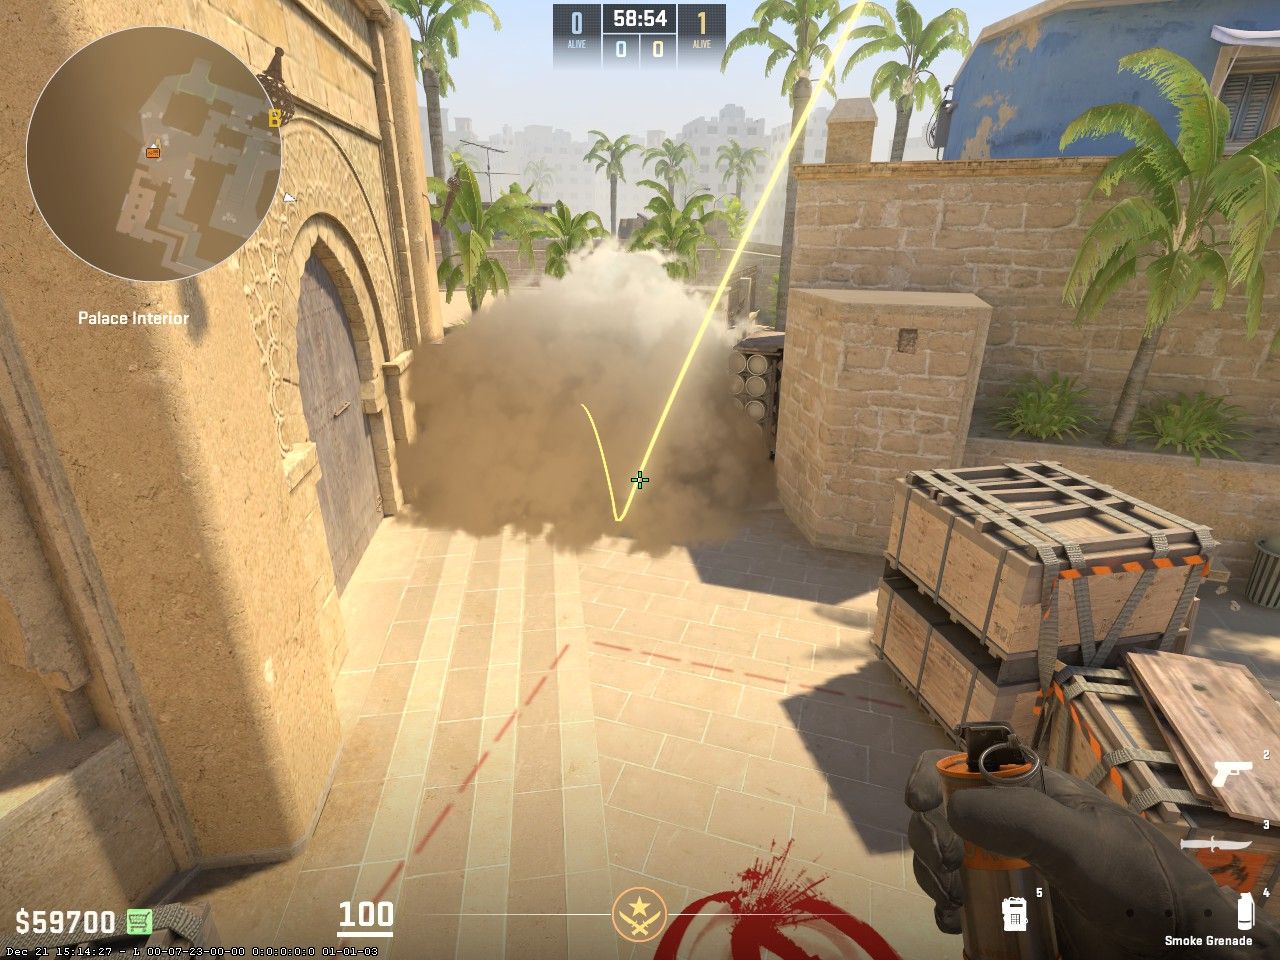
If thrown correctly, the market window will be fully smoked with no gaps.
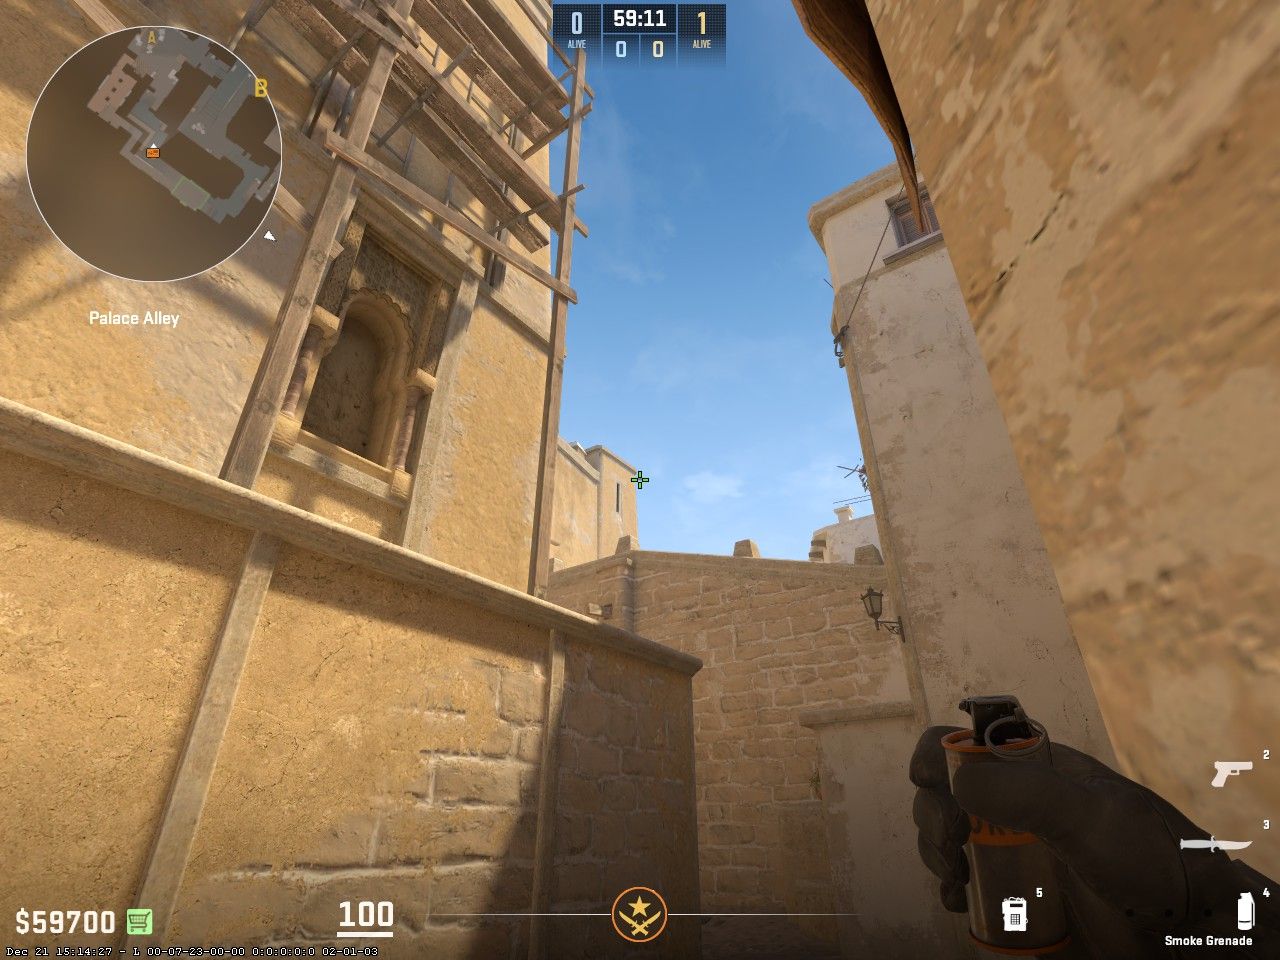
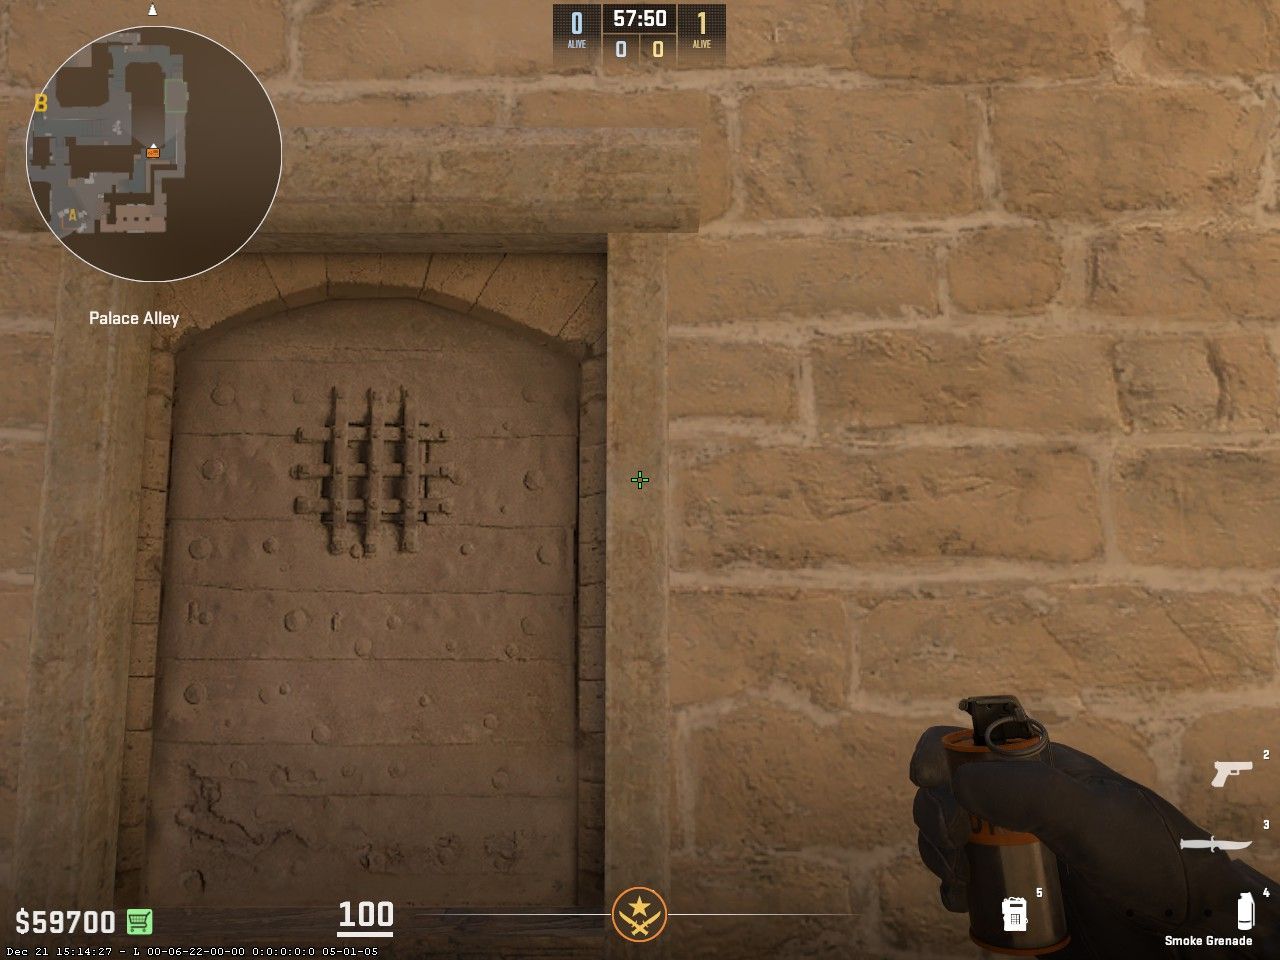
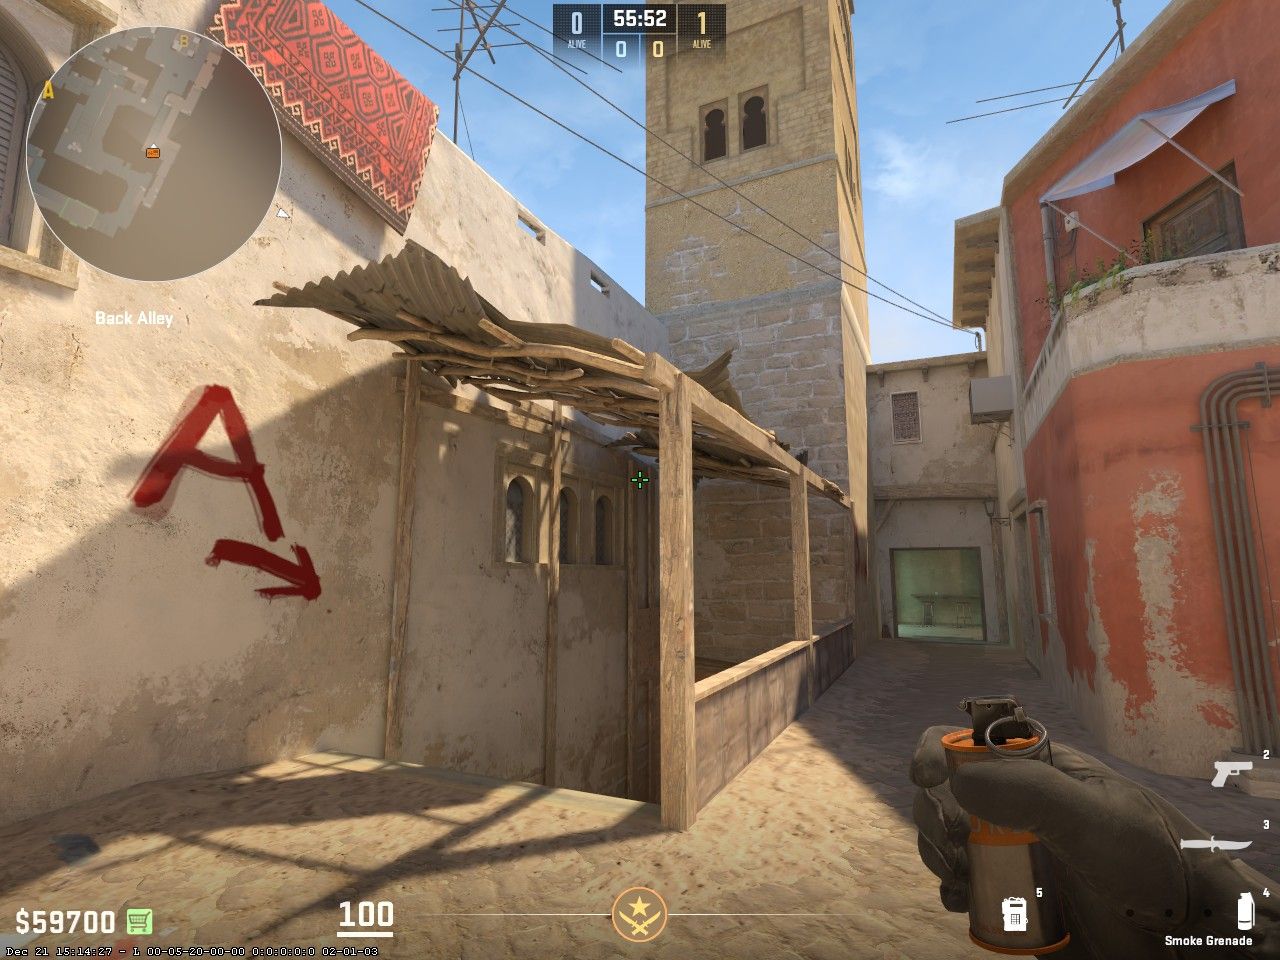
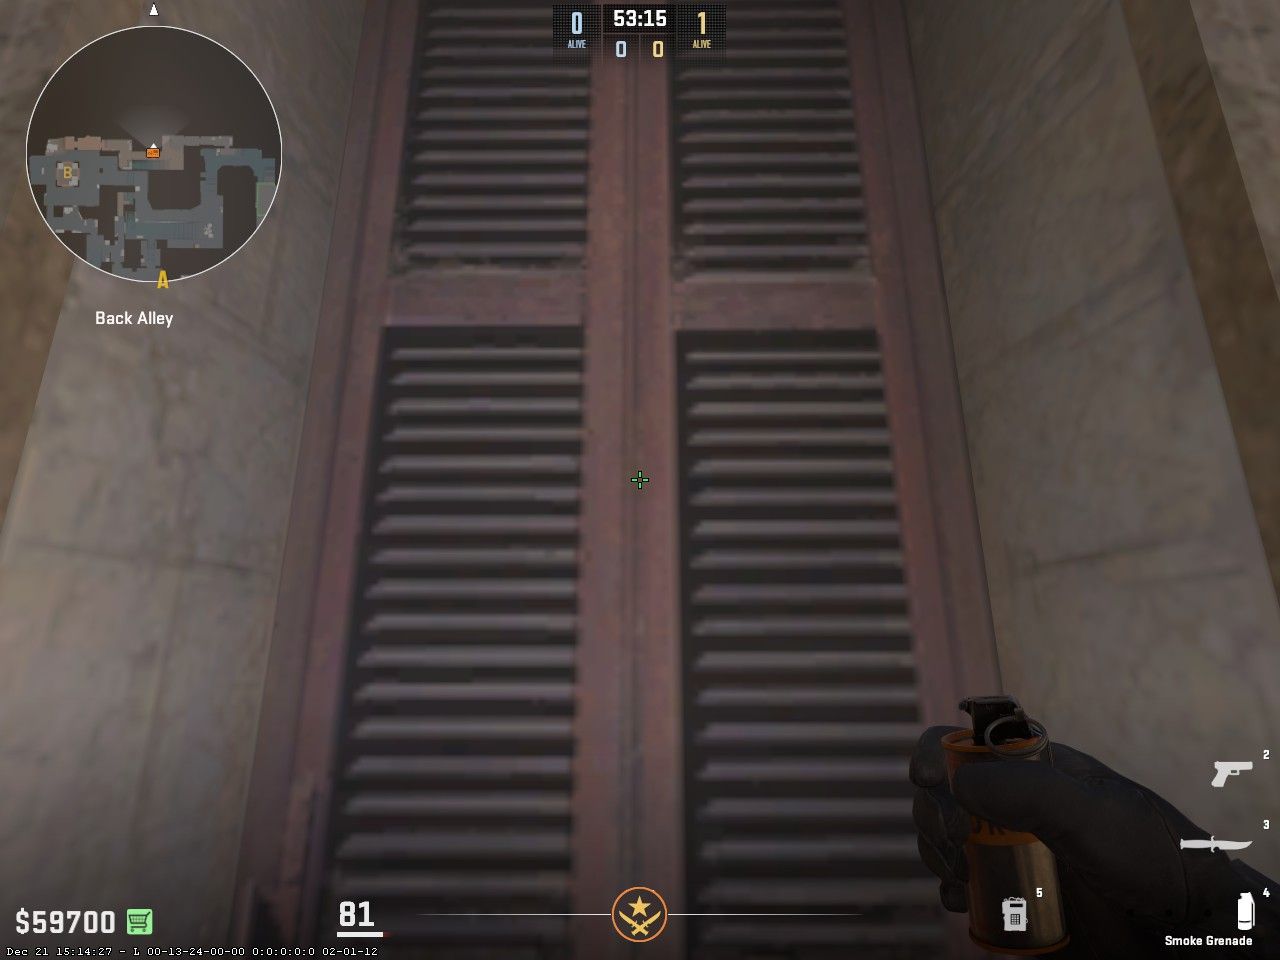
B Site Market Door:
First, get yourself stuck in this corner.
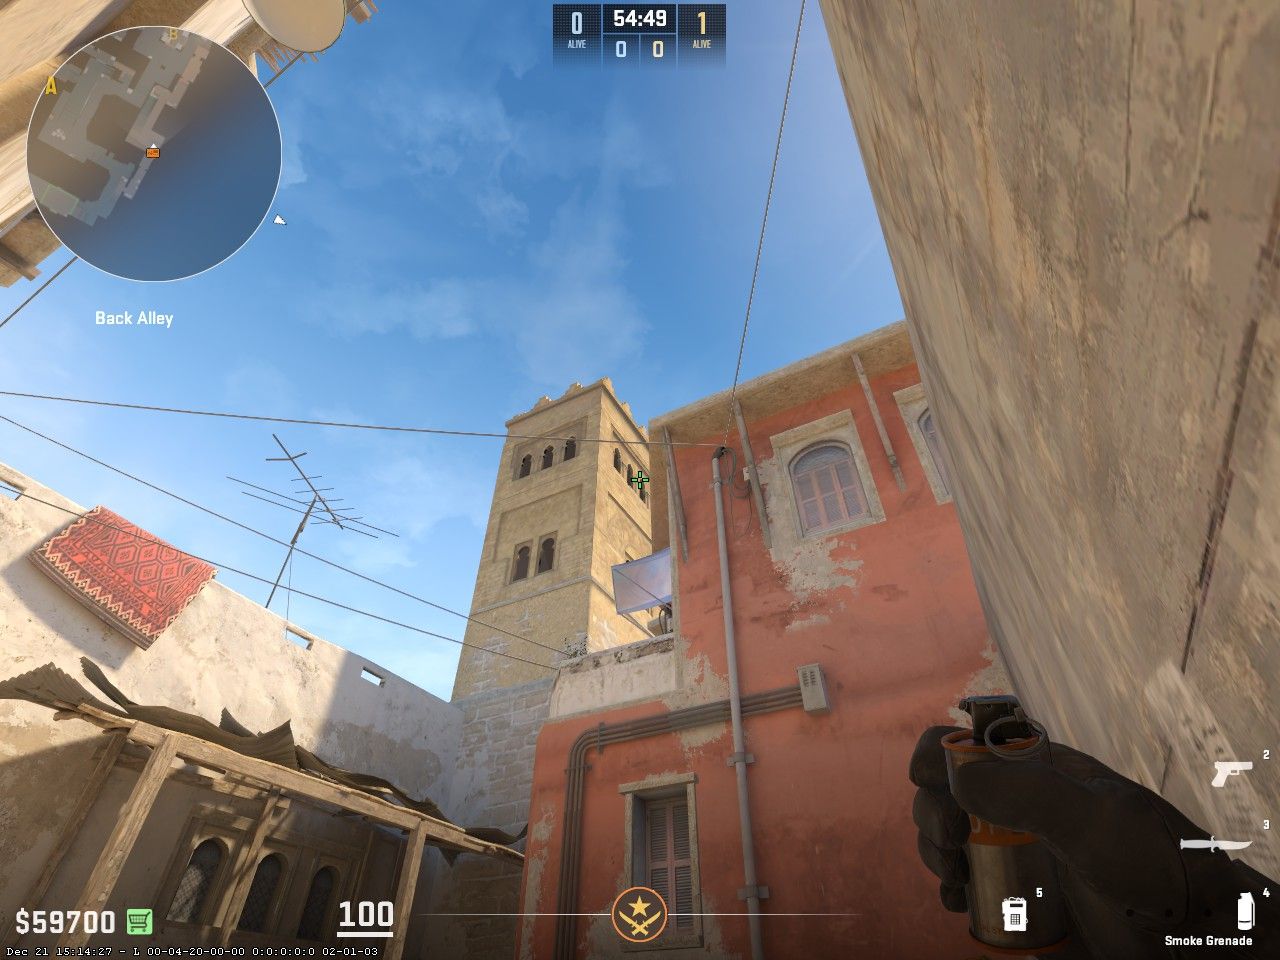
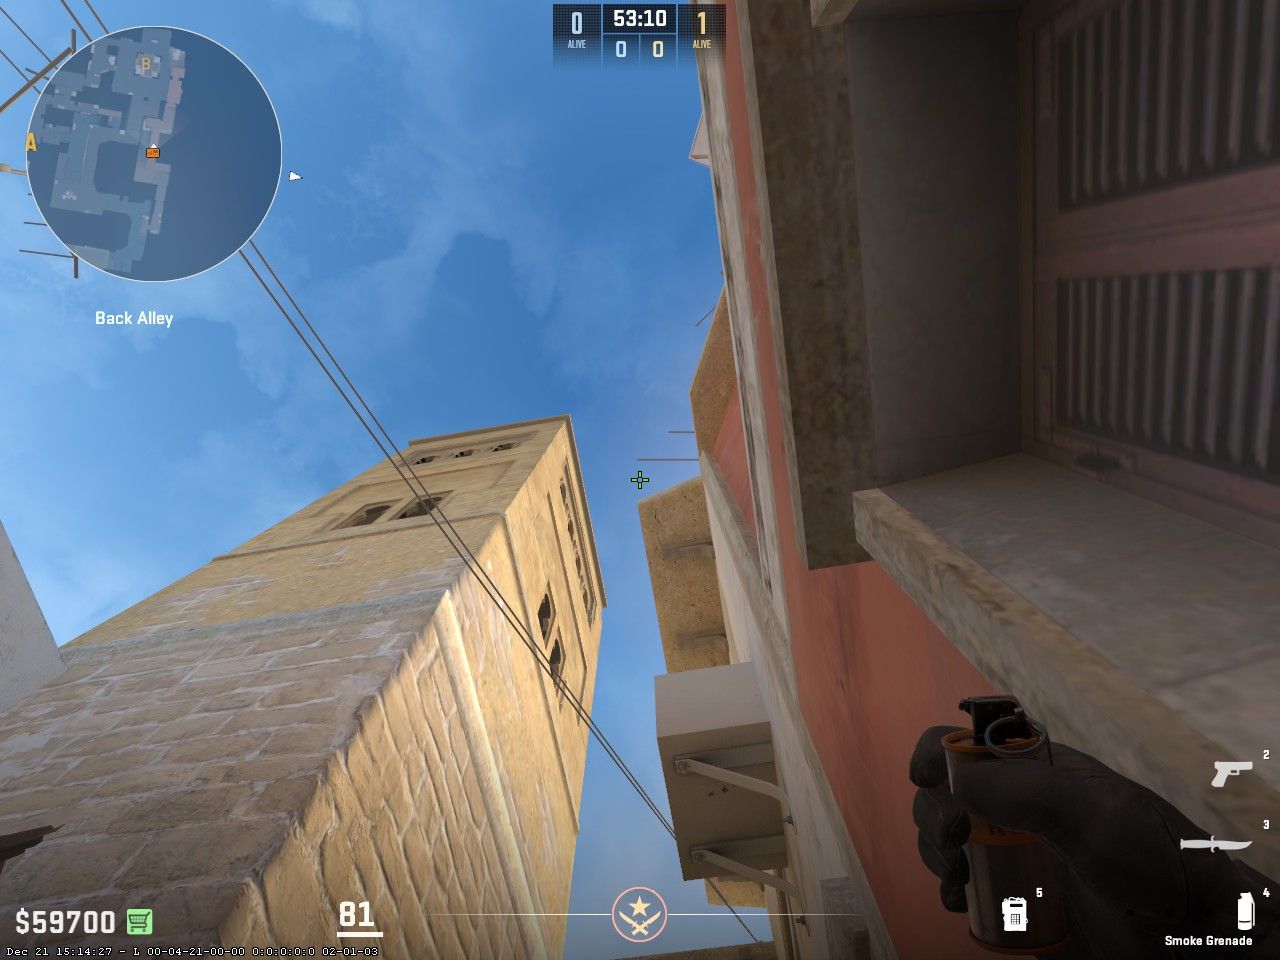
Then place your crosshair in between these two windows on the tower and left-click jumpthrow.

If done properly, the market door will be fully smoked off with no gaps.
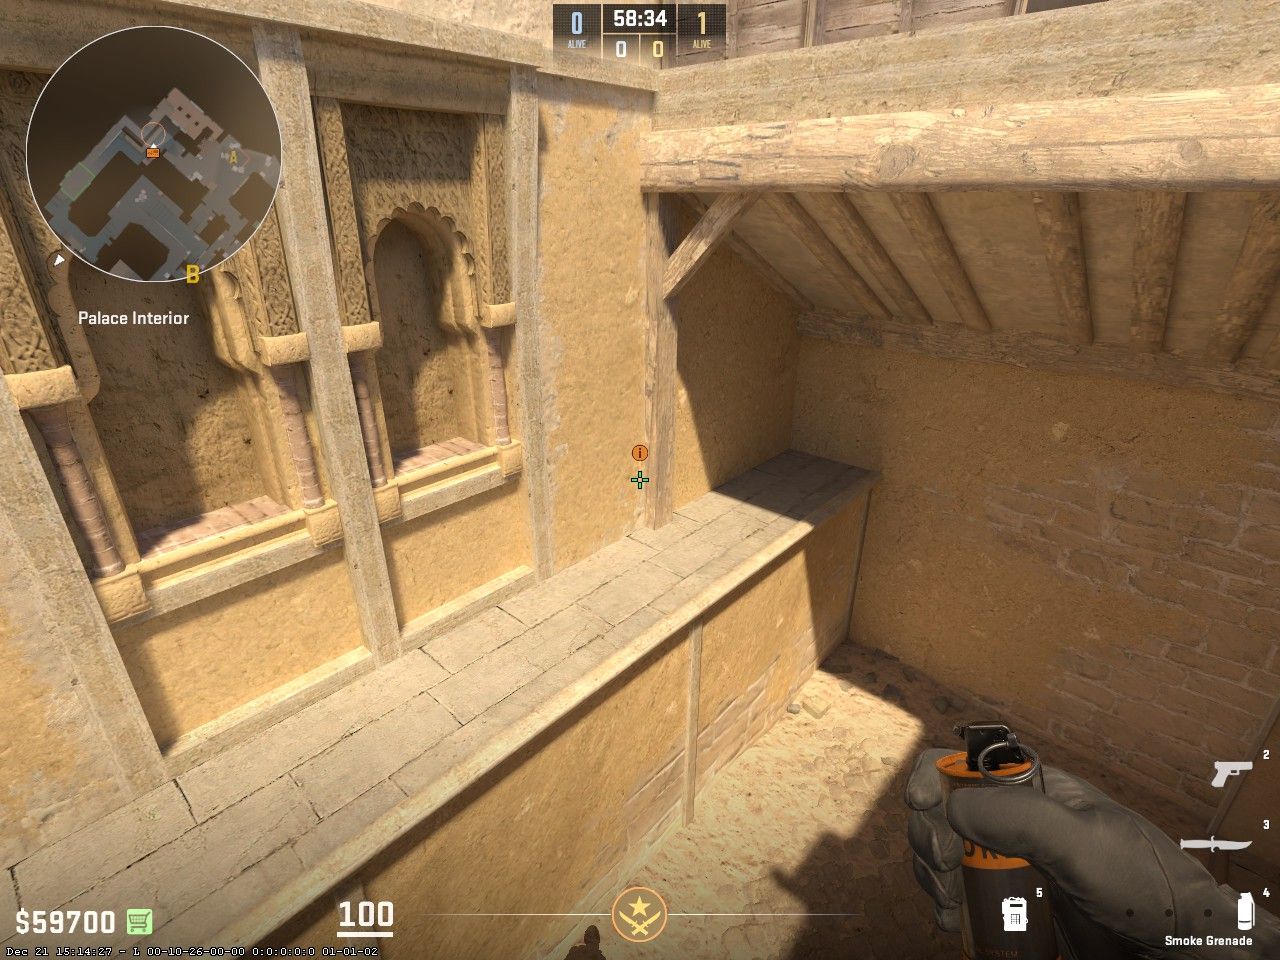
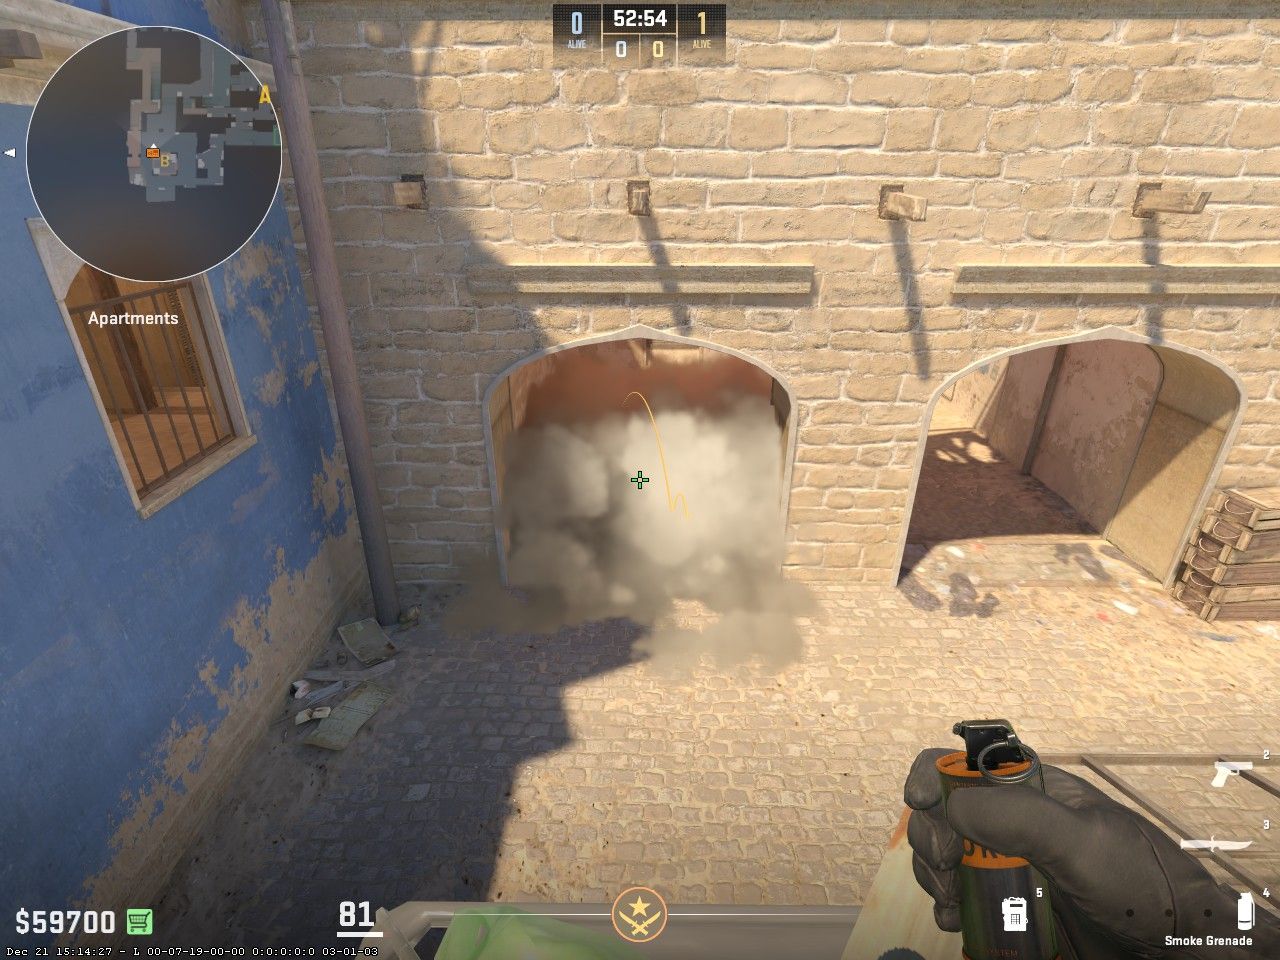
B Site Half Wall:
First, align yourself flush against this wooden pillar just above the underpass stairs as shown.
Next place your crosshair right under this stone piece on the tower and left-click throw. Keep in mind this lineup does not use a jump-throw bind, only a left-click throw.
If thrown properly, this smoke will cover "half wall" which is a common position for a CT to spot the Ts rushing from apartments.
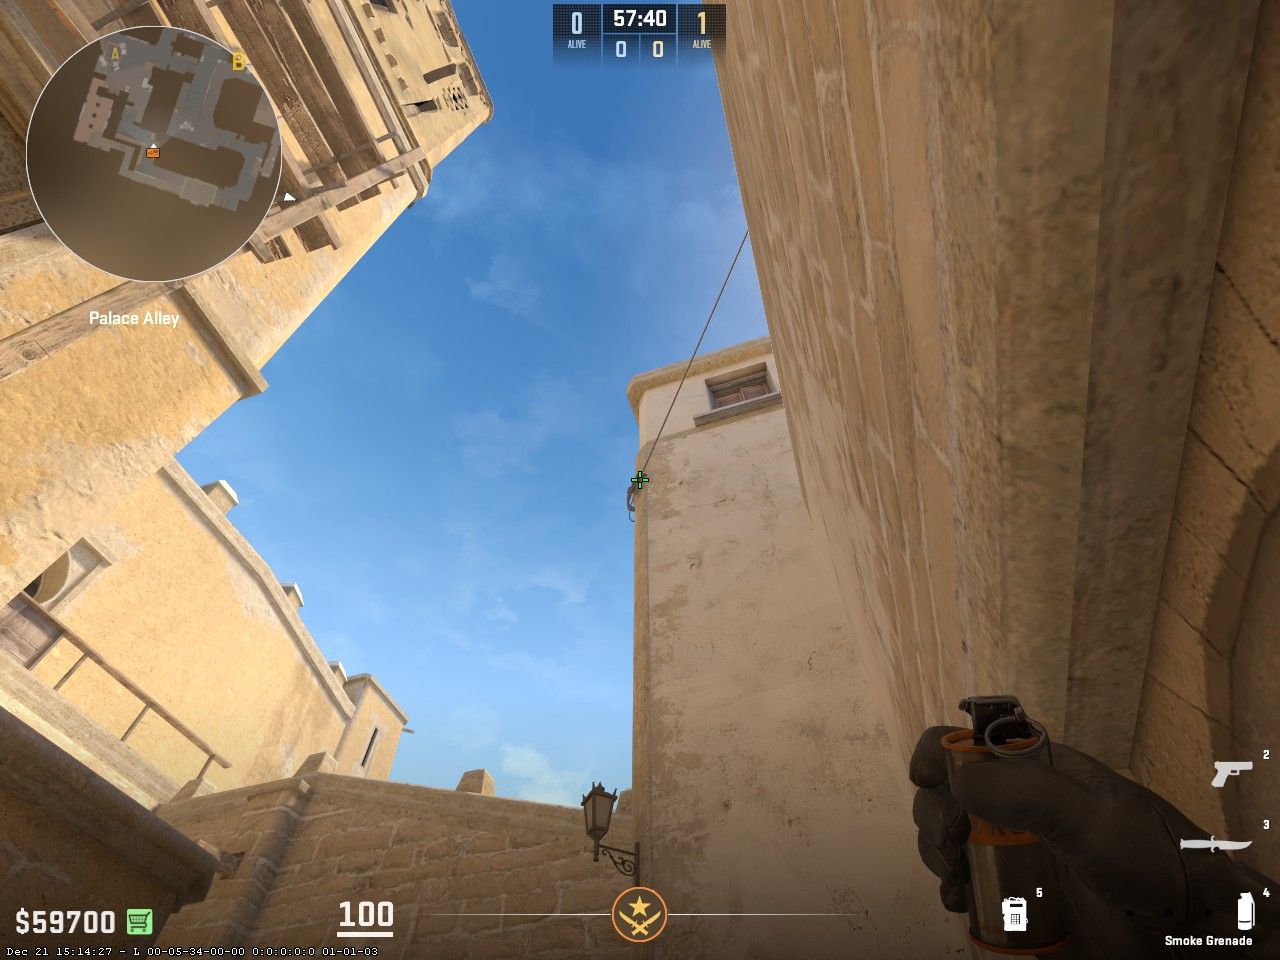
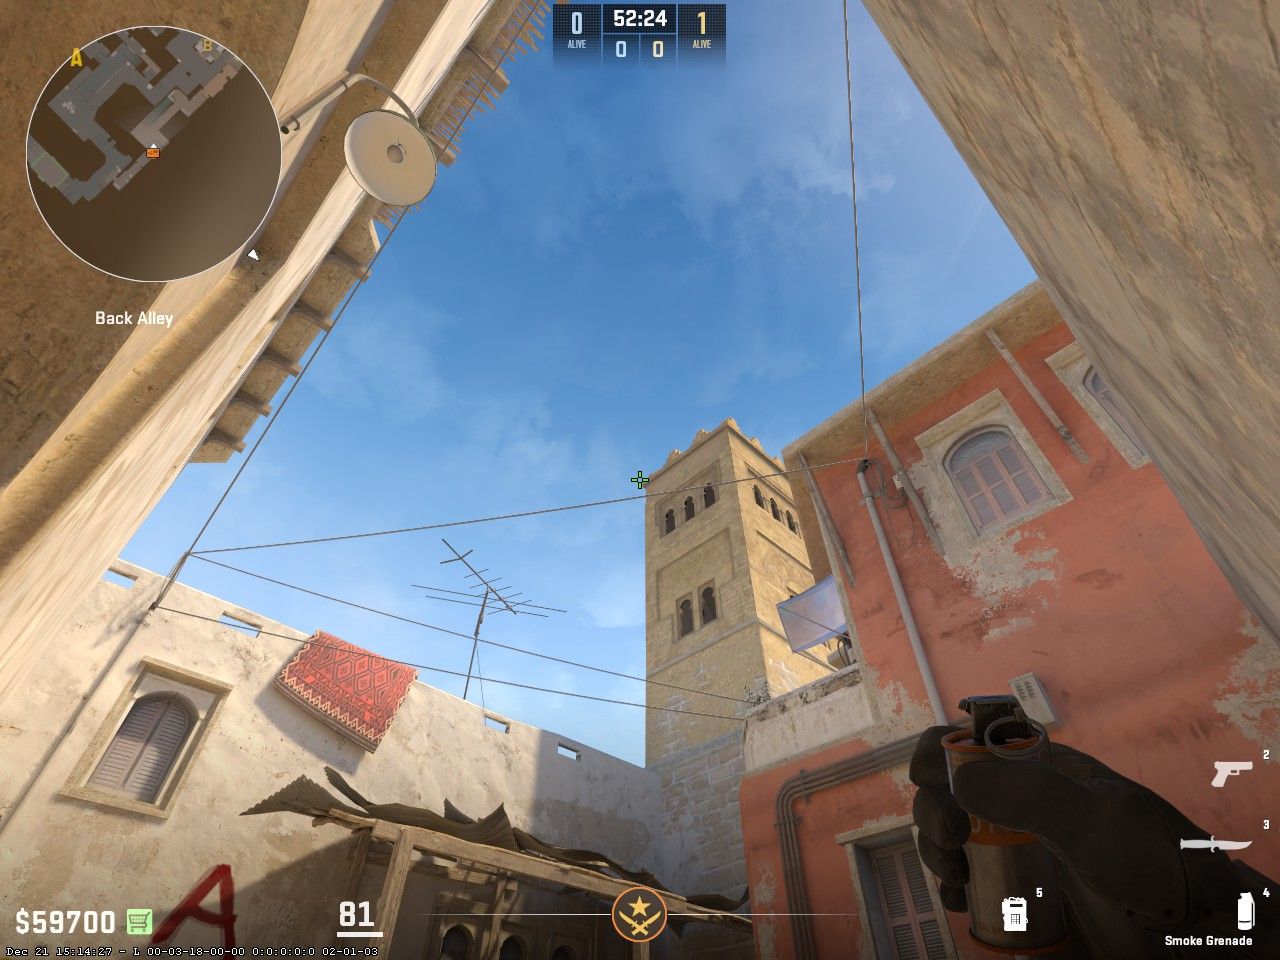
B Site "GeT_RiGHt:"
First, align yourself flush against this window in the middle as shown.
Next, align your crosshair in the middle of this wire and the stone roof and left click throw, no jumpthrow.
If thrown successfully, you can rush out of apartments without worry of a lurking CT.
B Site Short:
Same as the market door smoke, get yourself stuck in this corner.
Place your crosshair just to the left of the top left corner of this tower and left-click throw, no jump throw.
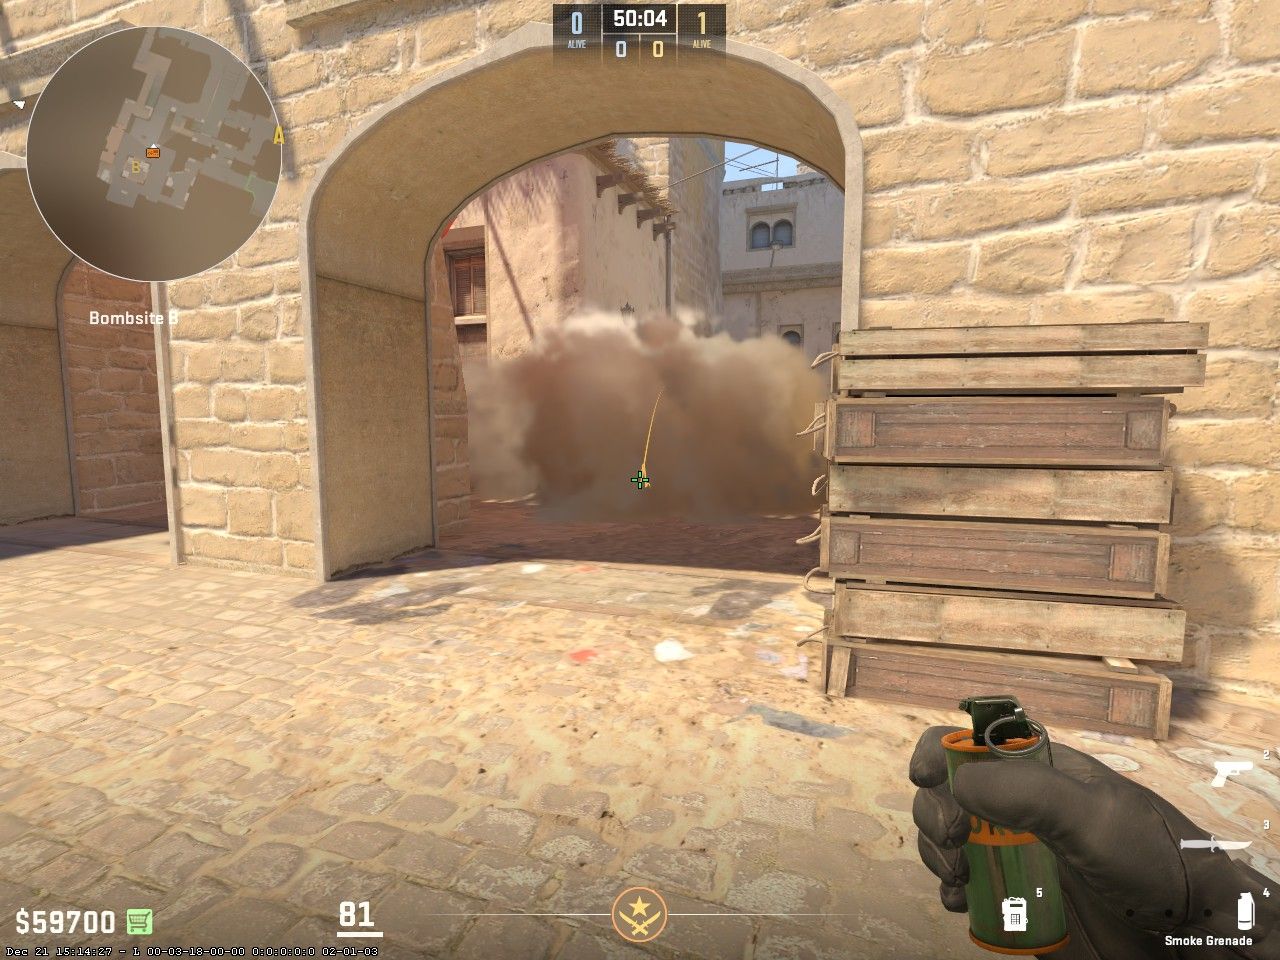
When thrown correctly, short will be smoked off with no gaps, blocking any retake attempts by CTs rotating from mid. This short smoke is best paired with the GeT_RiGHt smoke as shown above.
Combine these B-site smokes for a quick and effective B-site execute before the CTs can rotate and force them into a difficult retake.
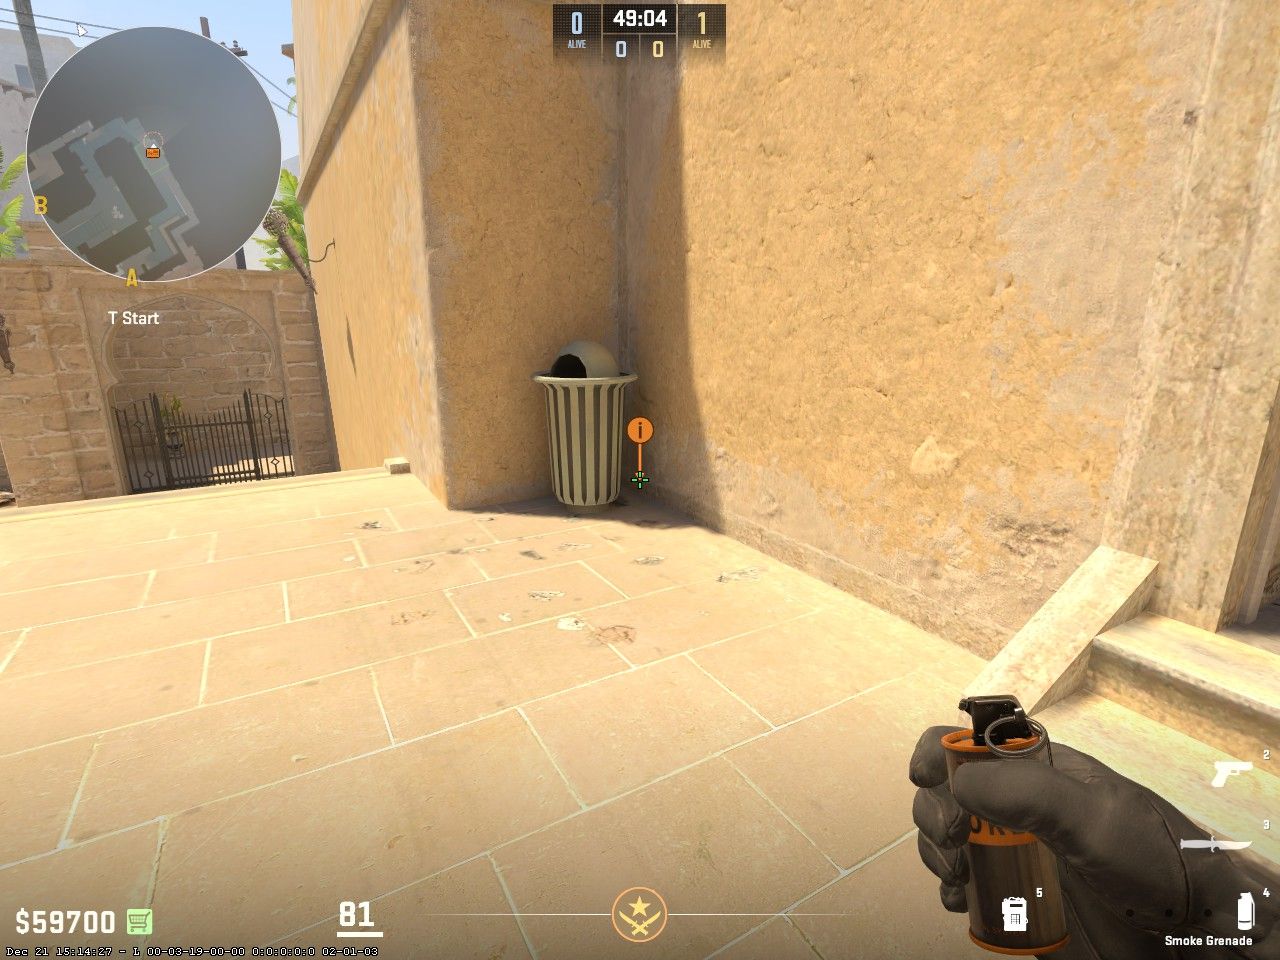
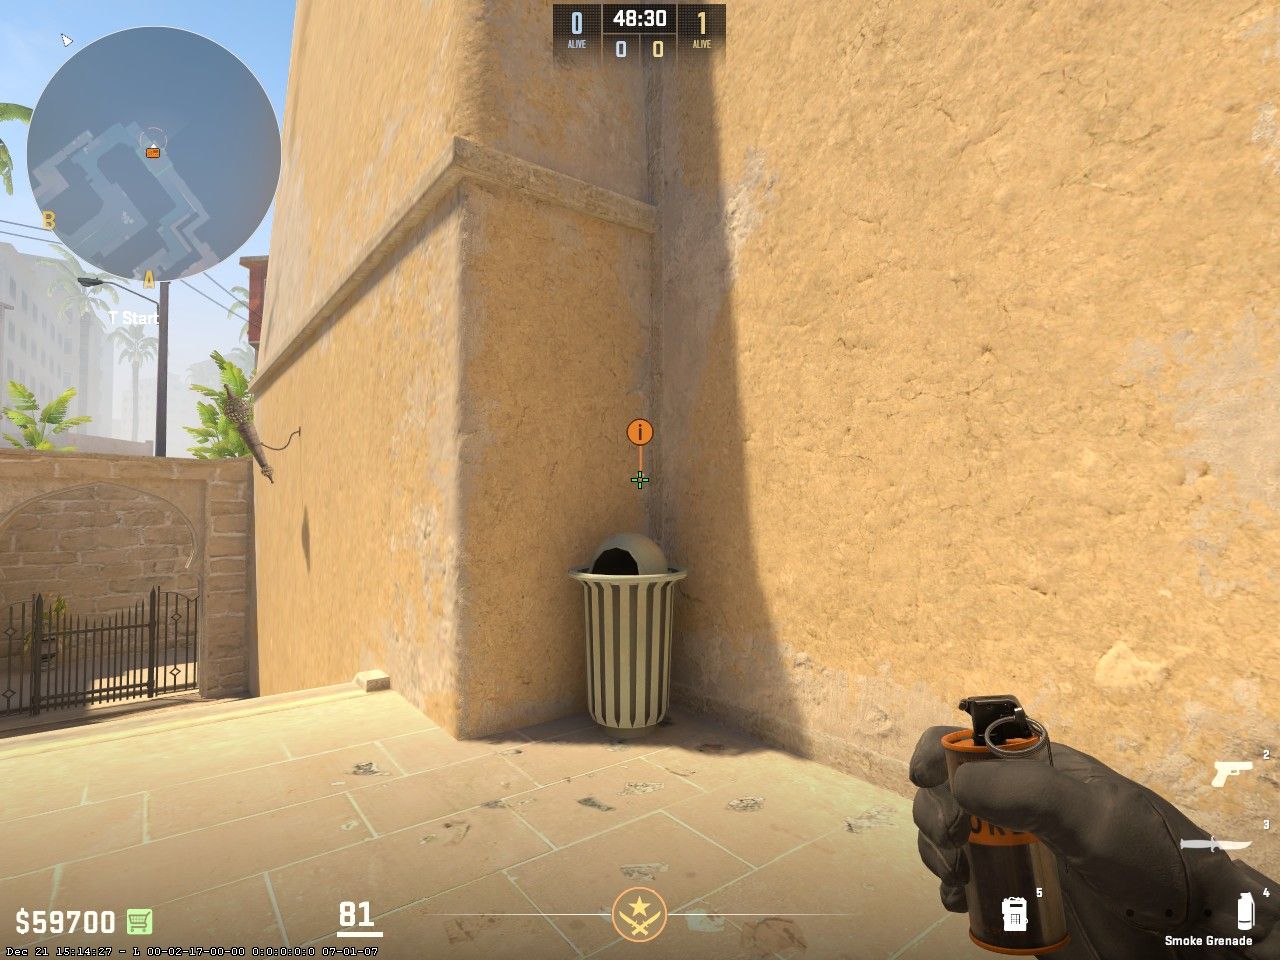
Mid Window:
First, align yourself so you’re stuck in this corner between the wall and the left side of the trashcan.
Then align your crosshair along this white stone pillar as shown. Hold D (right strafe) and left click jumpthrow simultaneously. It’s important to not hold D too long or too quickly or the lineup won’t work.
This mid-window smoke is quite forgiving and has no gaps for the CT to exploit. Keep in mind that the CTs can break this smoke for a brief moment with a HE grenade to spot for information or a quick kill before it closes back up.
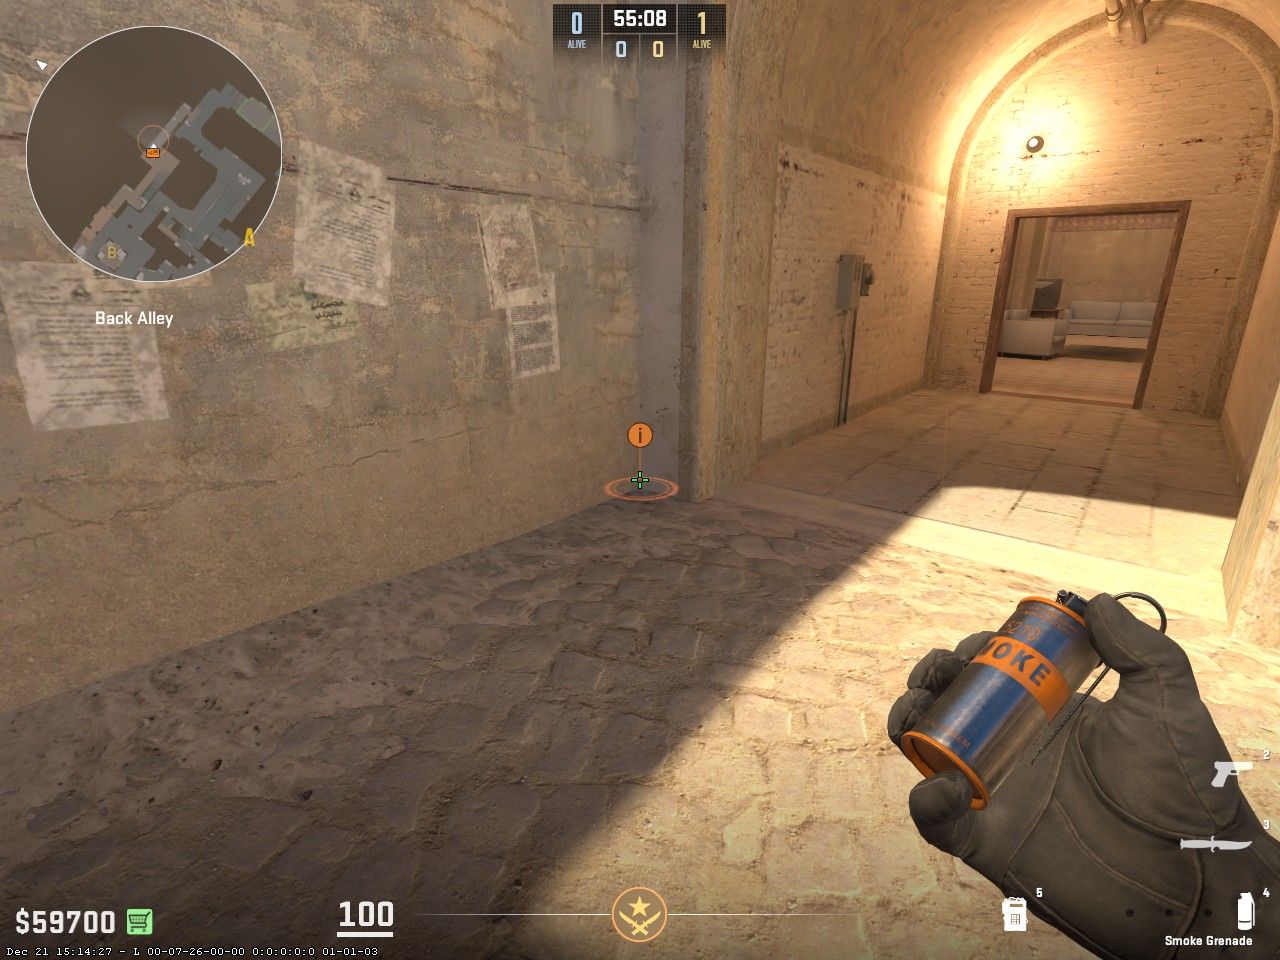
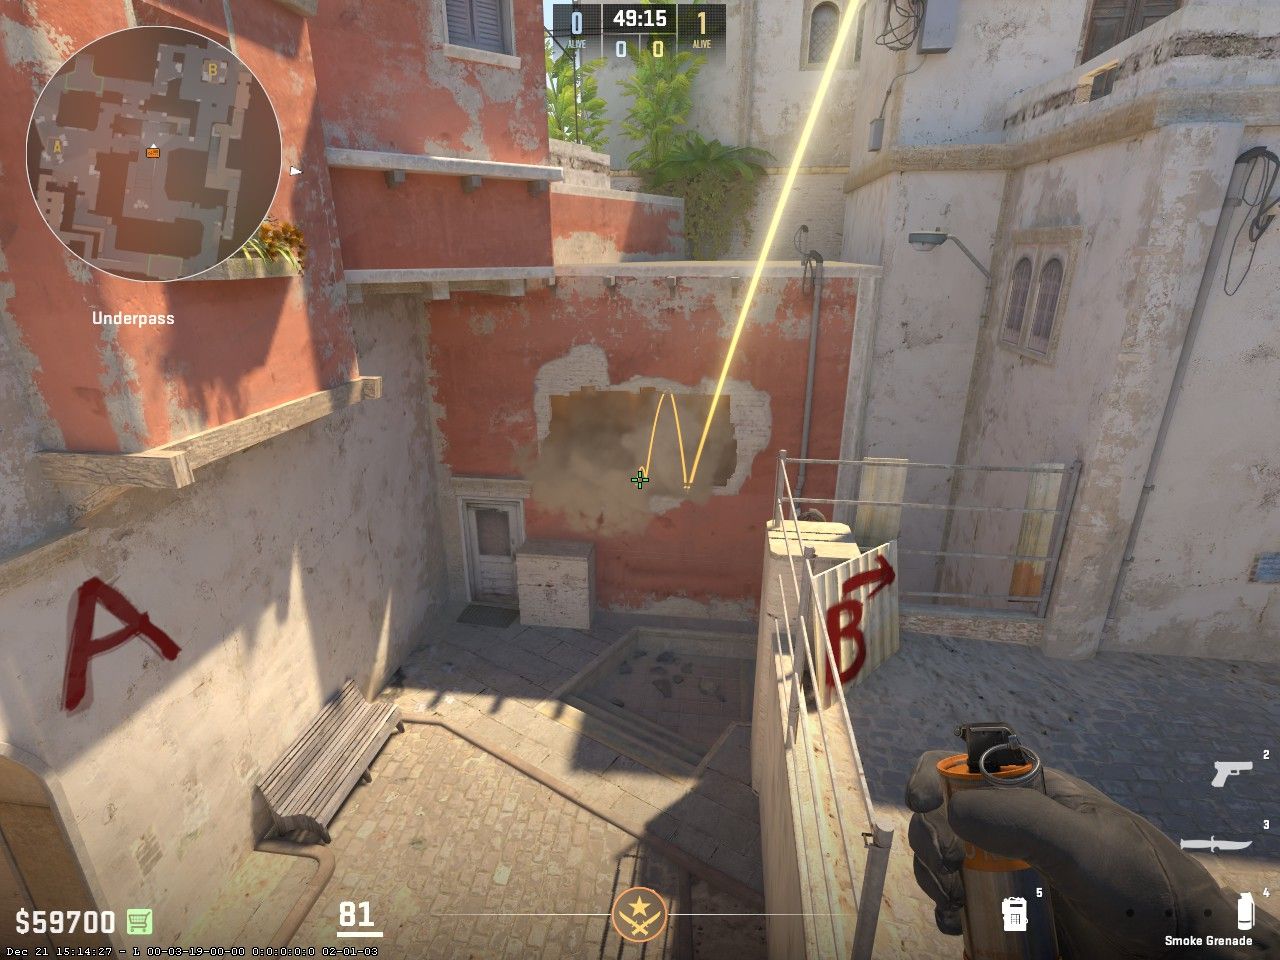
Connector:
First, align yourself in the corner and get stuck between the wall and the right side of the trashcan.
Then align your crosshair as shown here on the carpet and left-click jumpthrow.
If done correctly, this connector smoke will fill all gaps so a lurking CT cannot peak through into mid for information.
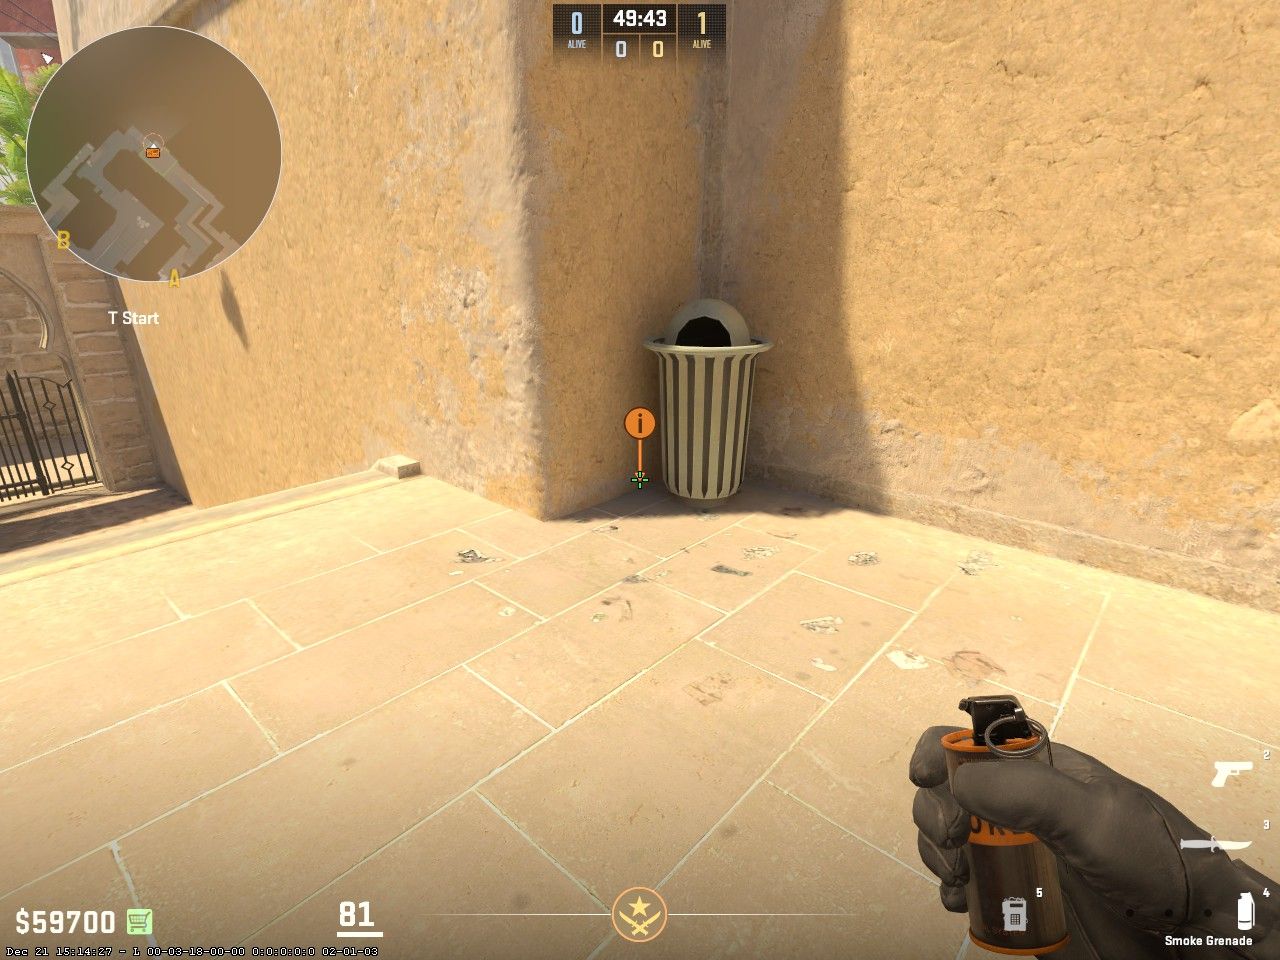
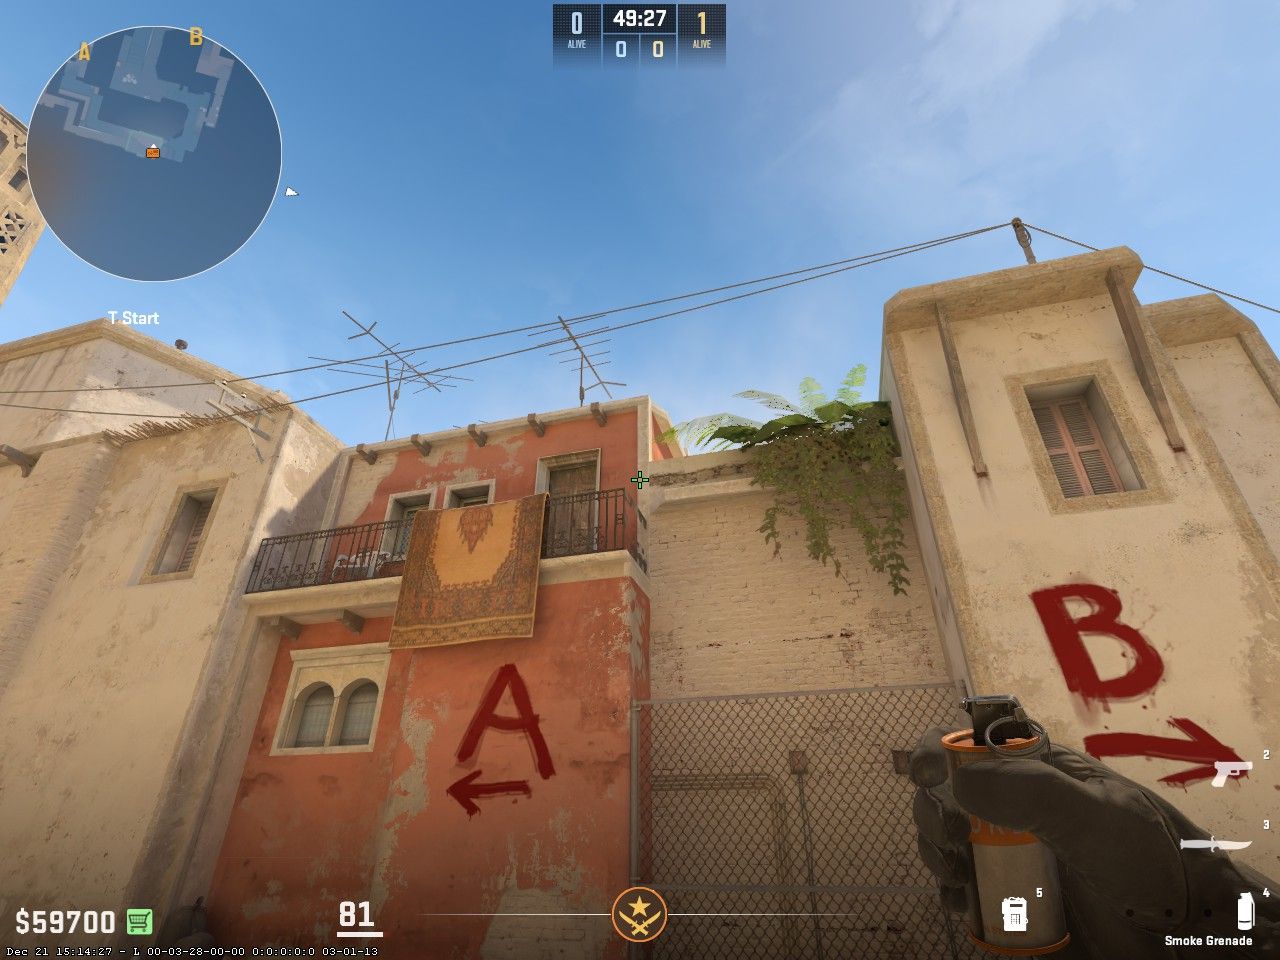
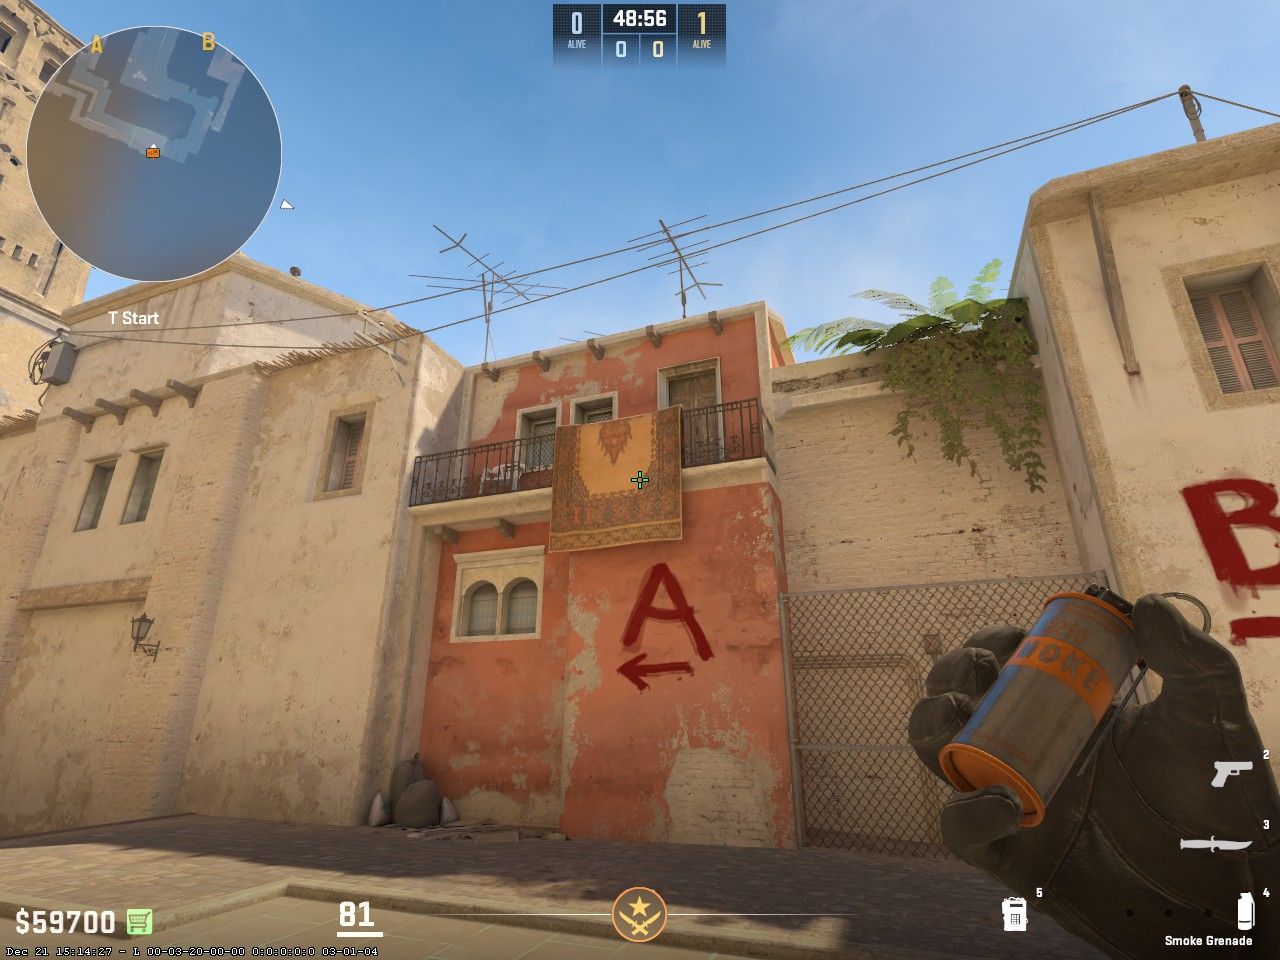
Top Mid/Cat:
First, jump on top of the trashcan in T spawn and get yourself stuck in the corner between both walls.
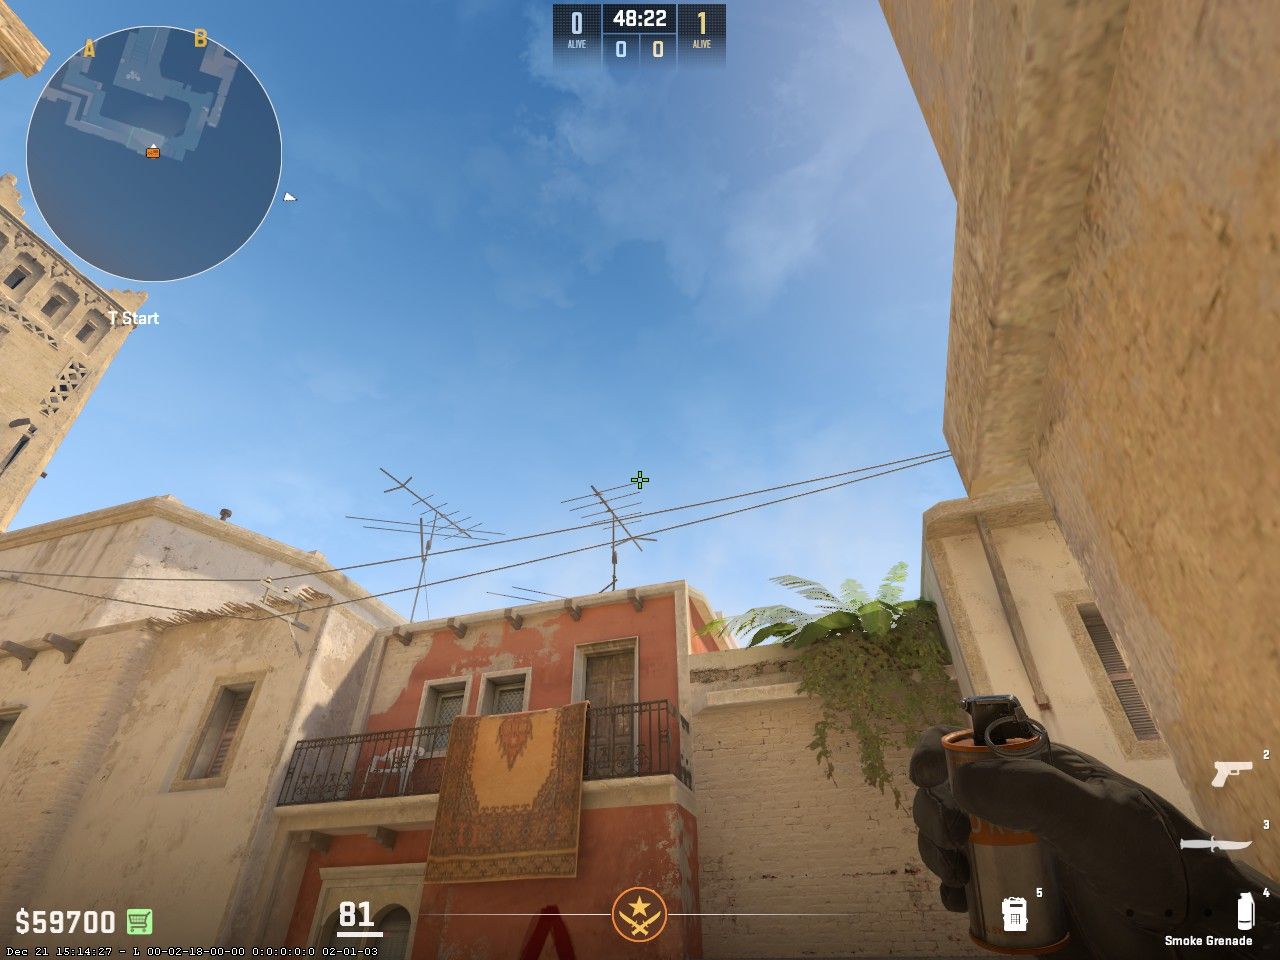
Then place your crosshair on the top right of this antenna and left-click throw, no jump throw.
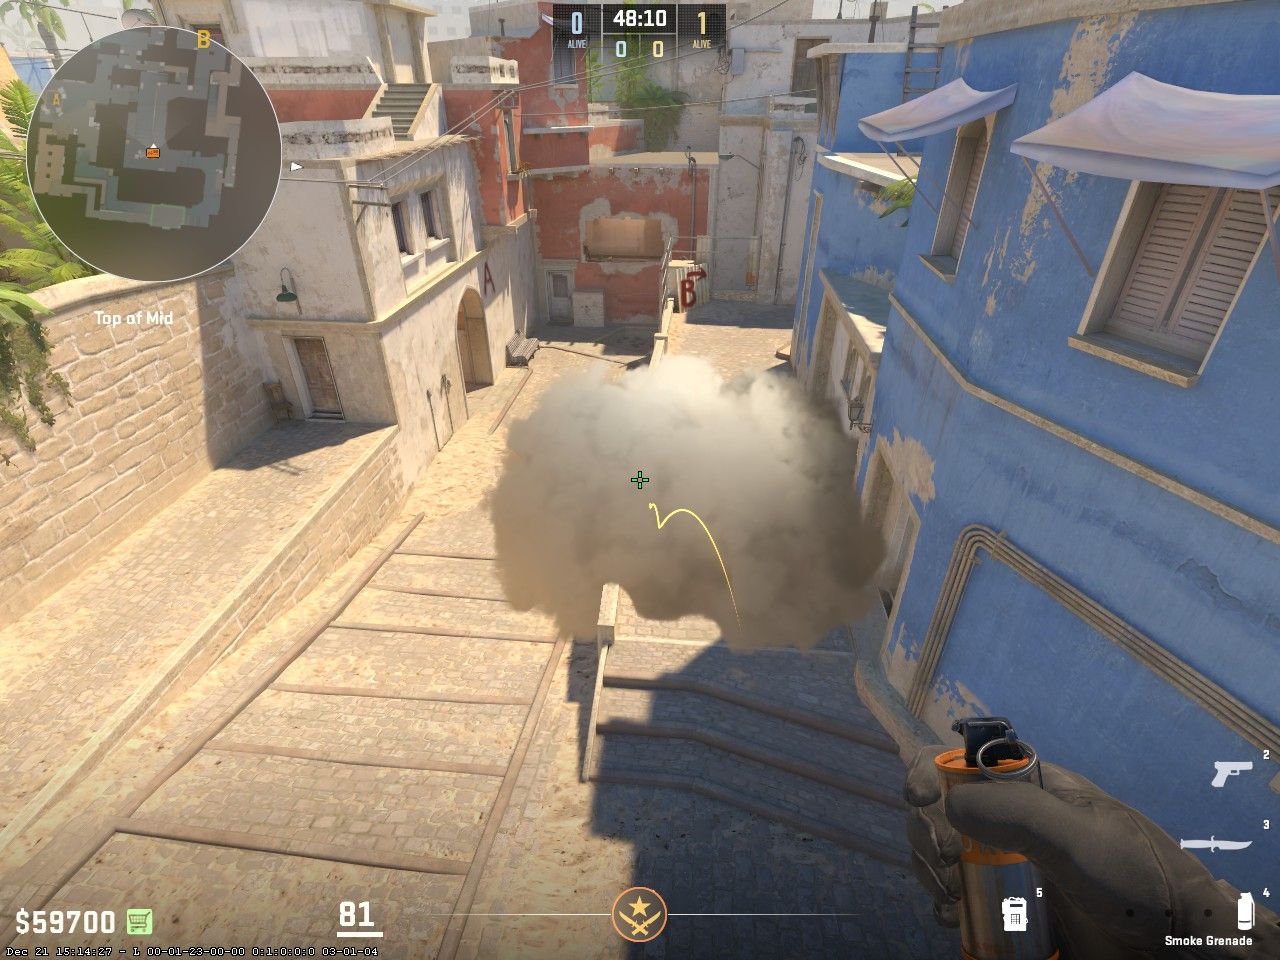
This top mid-smoke will block the line of sight from CT’s peaking mid-window, connector, and catwalk. This will allow the T’s to cross over to boxes and take mid-control from the CTs.
Combine these smokes to quickly take mid-control and move towards A site from connector and window, or B site from short and underpass through apartments.